Pebble screen corruption issue (take 2…..watch 3)

My original pebble watch suffered from the screen corruption issue that has apparently been plaguing all of the 301BL models.

Pebble was responsive and replaced it relatively quickly two months ago. Unfortunately, the replacement watch started to show the same types of issues, visible here in the region outside of the circle and around the first few digits on my Timer+ app.
screen_problem1

I contacted pebble and after opening a case, sending them a photo of the watch’s serial number, etc, they sent me (another) replacement pebble and a prepaid label to return the previous replacement watch.
Continue reading

Melted fuse leg

Driving down the road today I smelled a plastic/electrical burning smell, which caused me to stop the truck and run around it quickly checking for any problems in my new Lemelted_fuseaf modules. After verifying that they were not on fire, smoking, bulging, or even warm, I sniffed around the truck and decided the smell was emanating from under the hood, and eventually traced it to near my DC-2-DC converter (which keeps my 12 volt accessory battery charged up from the main 128 volt pack, replacing an alternator on an ICE vehicle). When I checked on the accessory battery voltage, it was 13.8 volts instead of the 14.5 volts that normally shows up when the DC-2-DC converter is working, so I thought that I had blown that out.

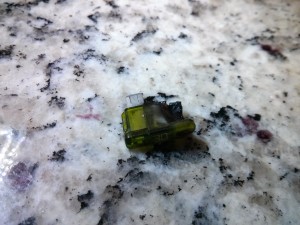
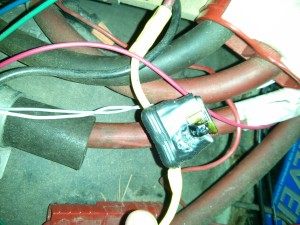
As it turns out, the only thing that had melted was the leg of the 30 amp 12 volt fumelted_fuse_holderse I have between my DC-2-DC converter and my 12 volt accessory battery. Note: the fuse did NOT blow. One leg of the fuse melted into the holder, melting one side of the fuse and the plastic holder. The DC-2-DC converter was still working (but no longer connected to the 12 volt accessory system), and all of the 12 volt components were working fine on the redundant battery power.

At the time this happened I had the headlights and fan blower on, so the 12 volt load was about as high as it gets, but I’d been driving around like that for several years without the fuse or holder giving me any problems.   The only explanation I can come up with is that the process of moving wires around for the Leaf Module install loosened up the fuse in the holder and caused a loose connection, and the added resistance heated the connection up until it failed. (Although the fuse looked to be fully inserted into the holder even after it melted…)

I will have to replace the fuse and holder, and I’ll probably zip tie the new fuse into the holder when I replace it.

Default Charging Profile: Charge to 80% capacity (quickly)

Because I have a relatively short commute, and rarely anticipate needing my full 100% pack capacity, I have chosen to charge my truck to an 80% SOC on a daily basis to maximize battery life. One nice thing about the 80% level is that most batteries can be charged at a relatively high rate of speed up to 80%, and then you need to slow down the charging a bit to prevent them from overheating. (This is why DC Quick Chargers will quickly bring an empty battery up to 80%, but then slow down quite a bit after that.)

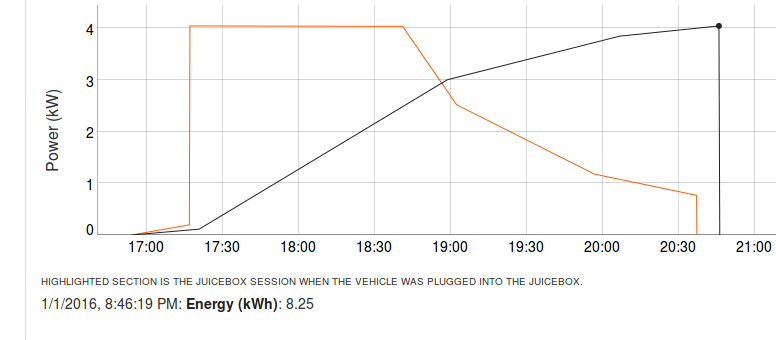
My first attempt at programming an 80% charging profile was very simple, just set   MaxV to 128.5 and set the TermC (termination current) to 2 amps. This works well, it gets the pack voltage up to 128.5 volts and holds it there until the battery stops accepting much current. The only issue is that it is wasting time, because for a good amount of the charging period the current flowing into the battery is less than the maximum 30 amps (4.0 kW) that the chargers can produce. The charging curve looks like this, with a 3hr 20 min total time:

charging_2amp_cutoff Continue reading

Thunderstruck Motors dual TSM2500 & EVCC charger package

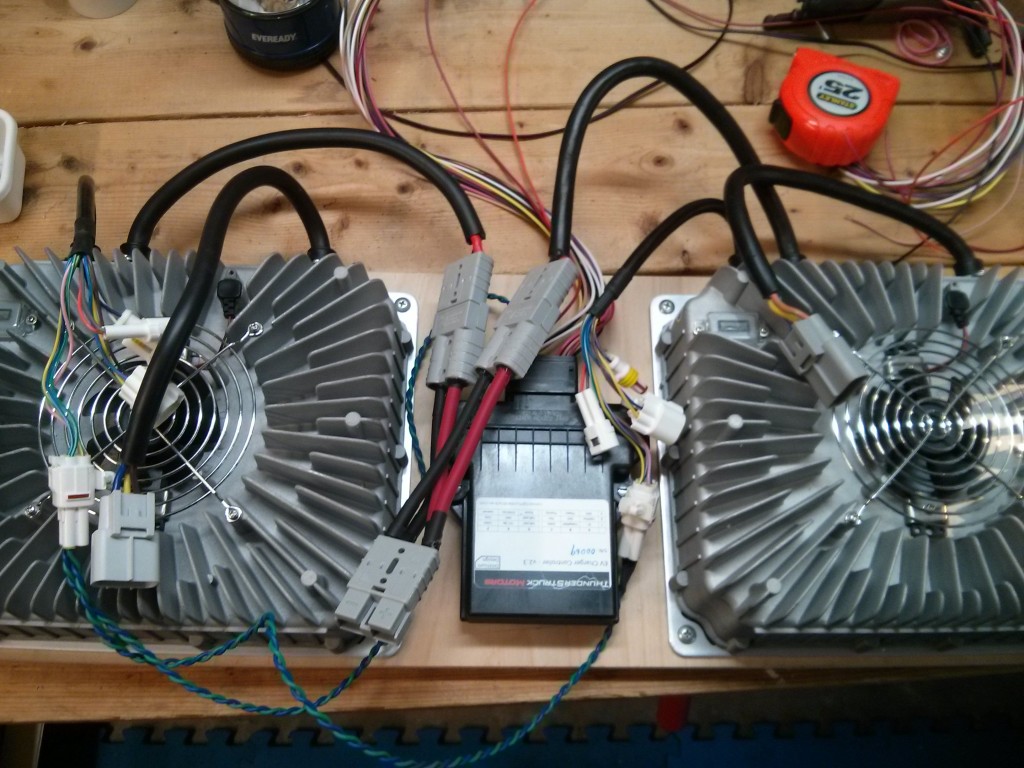
As part of the Li-Ion battery upgrade procedure, I needed a charger that could be programmed to work with the Li-Ion modules and my BMS loop system.   I decided on the EVCC (Electric Vehicle Charge Controller) from Thunderstruck Motors paired up with dual TSM2500 ( a.k.a CH4100) chargers. The total system cost just under $1200 shipped, so it was quite economical for a 4.2 kW system. The trade off for the low cost is that you have to wire both chargers up to the battery pack and the J1772 inlet in parallel, requiring you to make two sets of Y adapter cables. Theoretically the EVCC can control up to 4 of the inexpensive TSM2500 chargers, but I think wiring up two is about the most I would want to do, and if you want a high power charger it would probably be better to purchase one or two PFC-3000 or PFC-4000 chargers (which also interface to the EVCC).

06_y_in_place

I really like the EVCC, as it supports the J1772 protocol and can monitor my mini-BMS loop both for charging as well as for a low voltage warning when running. It also supports the ability to disable the EV when the J1772 plug is inserted (drive away protection).

The first one I received had a few software/firmware bugs that required me to send it back for a re-flash (one of the bugs made it so that the bootloader couldn’t re-flash it in the field!), but after I received the upgraded module it has been working well and I haven’t noticed any more bugs.

I have it set up with a single charge profile so far, but it actually supports 4 charge profiles that can be user selectable via a resistor network on a rotary switch. I have installed the hardware to select different charging profiles and will be programming them in the future.

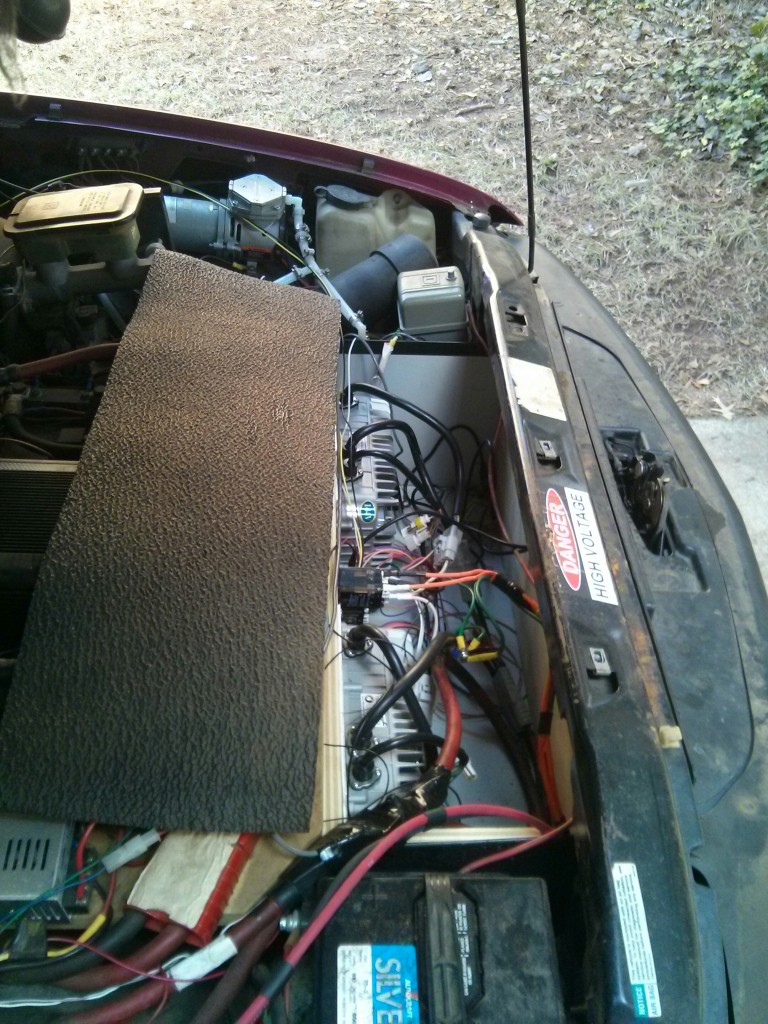
The two chargers, EVCC and a few relays (for switching between the J1772 port and 120 volt RV inlet) are attached to a piece of wood that fits into the former front battery bay of my S-10 conversion. Althought I COULD fit two more chargers in there, space would get tight, the wiring would be (more) messy, and I’d be worried about the airflow and cooling. As it is, I’ve found that 4.2 kW charging is plenty fast for me. I can take a 16 mile trip, which is much longer than my daily commute, and be recharged in 141 minutes.

charging_bay


I found a Chinese website selling the same charger with a different model number, and their technical specifications were slightly better, so I made a PDF out of the website which you can access here: CH4100-series_more_info

Lead Acid batteries for an EV: Not cost effective

20_golf_cart_batteries

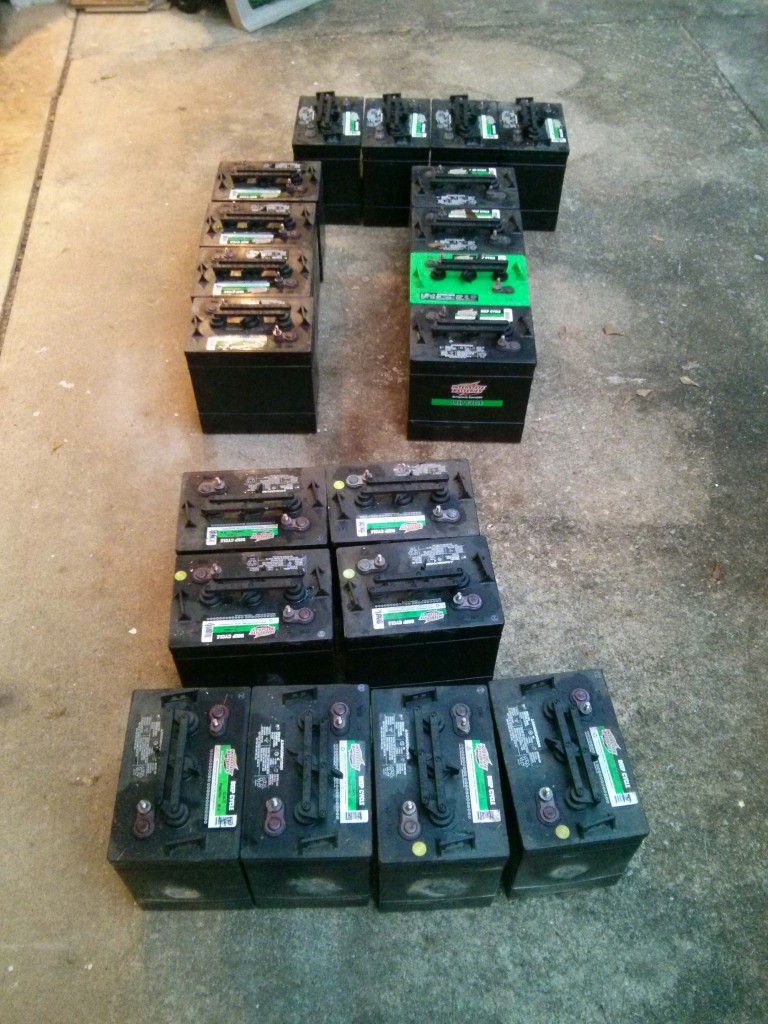
My first pack of Sams Club lead acid golf cart batteries only lasted 2.75 years and 4861 miles. Total cost per mile was 67 cents including electricity, batteries, and maintenance. The battery replacement cost accounted for 65+ % of my cost of ownership over that time.   My second set of Interstate golf cart batteries were even worse, lasting only 2 years and 2870 miles at 85 cents per mile.   (I paid $277 for electricity for the truck over those 2 years, so 88% of the cost was the battery purchase price.)

Obviously, from a cost per mile perspective, this is more expensive than gas unless your car is a real lemon (needs lots of maintenance) or a real gas guzzler (Like a hummer).   I’ve reciently replaced them with the battery pack from a salvaged Nissan Leaf.   Because I put in a lot of sweat equity to retrieve the batteries and lower my costs by selling off the rest of the car, I was able to purchase my 3rd pack for $1200, which is amazingly inexpensive if you compare them to “new” Li-Ion batteries, or even lead acid golf cart batteries.

leaf_pack_packaged

Of course, my total upgrade cost was closer to $4000, as I had to buy some hardware to mount all those Leaf modules, as well as upgrading my battery charger to make use of them.   However, when I go to replace them, all I’ll need to do is purchase a wrecked Nissan Leaf and swap the modules out, so I expect the replacement cost could easily be in the $1500-$2000 range.

And, they should hopefully last a lot longer than the lead acid batteries they are replacing (reports in the 1000-3000 cycles instead of 300-600 cycle range….). They certainly offer better performance! (More available power, lighter weight, etc I’m very happy with the upgrade.)

In summary, I can’t recommend lead acid batteries for any EV that isn’t a golf cart, and even then a LiIon upgrade would probably be worthwhile.

Ring Video Doorbell Review

A few months ago I purchased a Ring video doorbell (along with a Chime Wifi announcer). This is a doorbell unit that has a video camera and motion detector built in, as well as the traditional button. It is powered either by your existing doorbell wires (if you have them) or via a rechargeable battery.
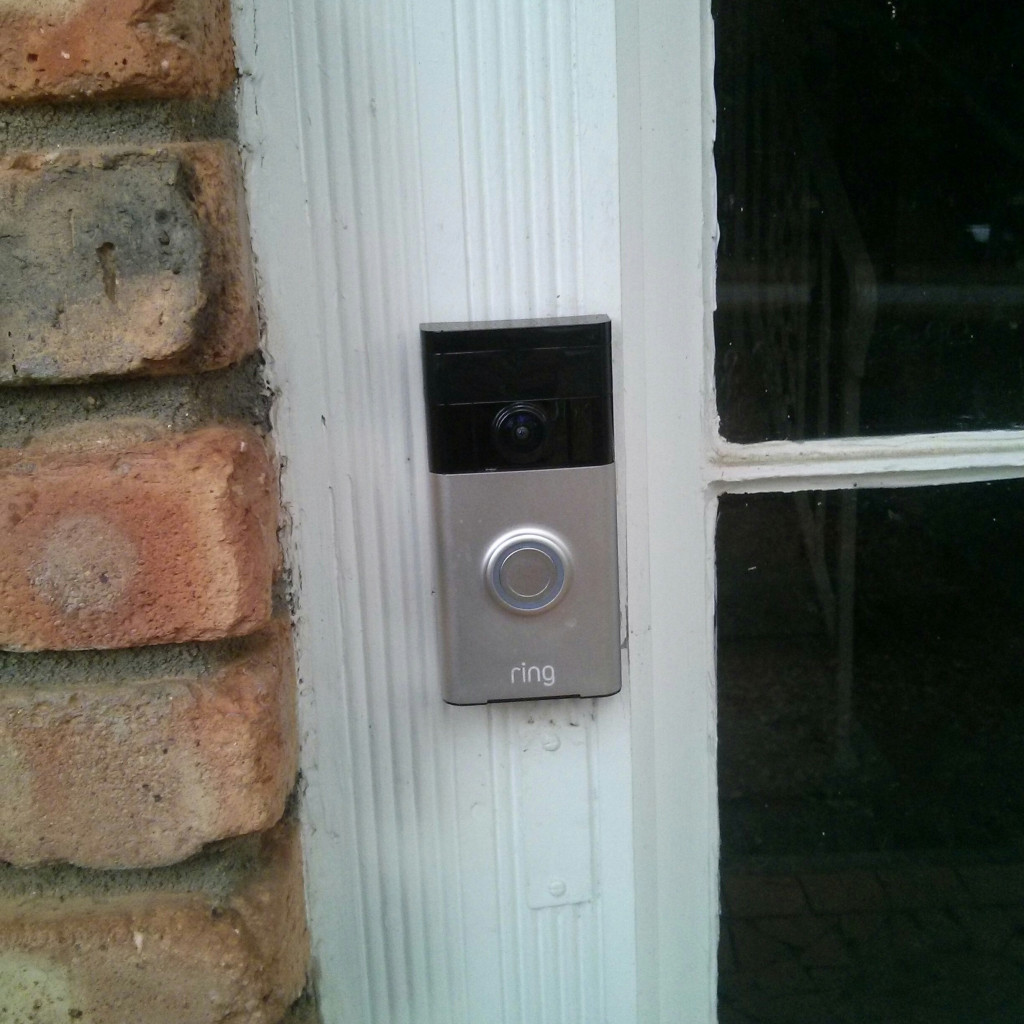
ring

It requires a connection to your home Wifi access point to work, as well as a smartphone (iOS or Android) to be configured and make use of the “video” part of the video doorbell.

When somebody pushes the button, your smartphone gets a “video call” and you can see the person at the other end and talk with them (they can’t see you) from anywhere your smartphone has a network connection. It can also be set to send you an alert whenever the doorbell sees motion, even if nobody pushes the button.

If you have a wired doorbell already, and connect the ring unit up to your existing wires it also rings your existing hard-wired doorbell like a standard $5 button. If you buy the optional WiFi chime unit that plugs into a standard power outlet, it will ring that as well (just in case you don’t have your phone nearby while inside the house).

An optional added service is their “cloud recording” option, which costs $30 a year, and stores a video recording when it sees motion or the button is pressed. In my opinion, 90% of the “home security” value of the doorbell relies on this cloud recording option, so if you buy the ring video doorbell, plan on paying $30 a year (for each ring unit if you have multiple) as well. (Which is a lot cheaper than buying and installing your own video recording hardware.)

The benefits:

  • I really like being notified when motion occurs at my front door. It can tell you when packages are delivered (most delivery drivers push the button, but some do not and are detected by the motion detection feature), or when a family member arrives home.
  • The “video call” option can make it appear that somebody is inside the house, even when you are not. You can tell somebody that you are not interested, or to drop a package at the door, etc… (this can also be used to “greet” the visitor from within your own house without actually coming to the door, due to laziness or safety concerns.)
  • Having a doorbell with an obvious “video camera” built in should help with home security, as long as potential burglars notice it, even if it’s not working.
  • Having a video recording saved (offsite, in the cloud) every time there is motion near your front door is a very nice security feature. (This requires $30 a year subscription.) With this you can check to see if/when a package was delivered, even if you missed the initial “call” from the doorbell, as well as the obvious home security applications.

The downsides (areas for improvement):

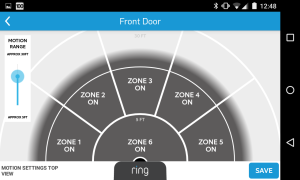
    • Motion detection can be overly sensitive, and not sensitive enough at the same time. The Ring unit has “zones” where you can turn on or turn off motion detection, and adjust the “range” of the motion detection. However, it uses passive IR detectors, which mostly detect movement of a heat source. My front door faces a street (about 50 feet away) and heat from moving cars will set off the Ring unless I turn all of the zones off except the one directly in front of the unit. And then, it will only detect motion from people if they actually step onto my porch. Even so, very hot vehicles (such as garbage trucks) will still trigger a motion alert. My motion sensitive lights do a better job of detecting people walking around without getting false positives from the road.
      Ideally, you will be able to mount it such that a road is not in it’s field of view, even if the road is relatively far away from the front of the house.
Screenshot_2015-12-04-12-48-06

  • The wifi/network connection is mostly fast enough, but not always. Typically I will get a notification on my cell phone within a few seconds of motion being detected or the button being pushed. However, sometimes this delay extends into the 10-30 second range, by which time whoever was there has already left. If you pay the $30 a year fee for “cloud recording”, you can go back and view who you missed, but you can’t actually talk with them. And on one memorable occasion when they were having problems with their servers, the Chime wifi doorbell announcer unit would “ring” about 10 minutes after the Ring doorbell was pushed!
  • If the doorbell isn’t connected to existing doorbell wires driven by a low voltage AC transformer, you need to take it off the wall and re-charge it every few months. The battery life is quite respectable, even with the motion detection settings set to “frequent” it lasted around 50 days for me and if you turn the motion detection settings to “smart” it should last 2-3 months. But still, it takes 5 minutes to find the special security screwdriver they include in the package, take it off the wall and plug it in. (Also, you don’t have a doorbell for the 8 hours it takes to charge.) The phone application will notify you when the battery is getting low.
  • It requires wifi to work. If your DSL goes down or wifi router is on the blink, your doorbell will not sound a chime. (Even though the Ring unit makes some noise and flashes a light when the button is pushed, giving the person outside the impression that the doorbell activated. (If you have it hard wired into a “real” doorbell it will at least ring the wired doorbell inside your house, even if it can’t notify your smartphone.)

Overall I’m happy with the device, and it works relatively well overall, but having it hard wired into a “real” doorbell would definitely improve things. I think that if you are replacing an existing (wired) doorbell button it would provide the best experience. Our house had a wired doorbell at one point in time (but it was replaced with a wireless doorbell before we moved in) so I’m hoping to re-wire the Ring unit up to a physical doorbell and low voltage AC transformer so that it will work as well as a regular doorbell even with networking glitches, and never need to be re-charged. The biggest win in my mind is having a cloud based recording of any motion near your front door.


Update 2016: After being installed for several years, I had an issue where the screws in the bottom of the ring got corroded, and “stuck” to the push in metal nuts inside the ring. when I tried to unscrew the doorbell to charge, the metal nuts broke free of the plastic. (This may be because the people who pressure washed the townhomes were were living in had used some type of chemical that wasn’t good for the metal.) The ring doorbell itself still worked, but it wouldn’t mount anymore. Ring customer support sent me a free replacement, which was very nice of them, as it was out of the 1 year warranty.

Update 2018: I came home one day to find my ring doorbell unresponsive. I thought it might be due to a low battery, so I charged it up, but it turns out that the problem was something else. Although it would accept a charge, we were unable to get it to “boot” up, or attach to a wifi network. Ring Technical Support walked me through the procedure to reset the unit to the factory default firmware/bootloader, but that did not work. Luckily for me, I had recently signed up for the Ring Protect Plus service, which includes extra warranties on the devices, so they sent me a replacement unit.   The screws on the bottom of this unit showed some small evidence of corrosion, but it was not as bad as the previous unit and they did not get stuck.

All in all, the ring devices appear to be relatively robust, the technical support is top notch, and if you are signed up for the Ring Protect Plus plan the warranty coverage is very good.

Update 2020: I upgraded this unit to the 2nd Gen version and am happy with the improvements.

16 volt Nissan Leaf Battery Management System (BMS) information

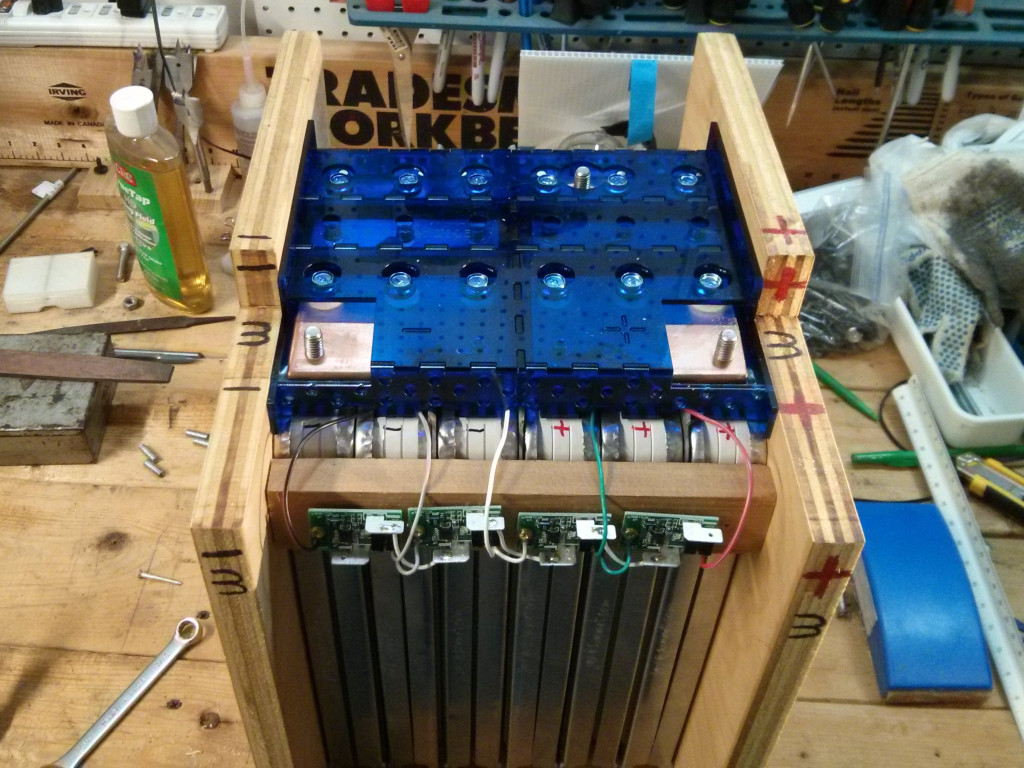
In a previous post I have shown how to physically mount six Nissan Leaf battery modules in two series groups of 3 parallel modules to build a 180 Ah by 16 volt Lithium (LiNMC) battery.

The batteries are covered by these very cool laser cut acrylic protective covers (which obscure the BMS wiring).
cover_with_bms_topview

Anthony Felix asked for more information about the BMS units I’m using on my batteries, so here it is! (Jump down to the last picture if you just want to see where the BMS units are attached….all of the text between here and there is an explanation of WHY they are attached there…)
Continue reading

Ubuntu 14.04 Zoneminder PPA not showing images or videos in the web console

When you use the Ubuntu package manager to install Zoneminder on Ubuntu 14.04 using the PPA, one configuration line defaults to the wrong path. This prevents the web console from showing you videos or events, although if you configure a camera it will capture pictures from it correctly and show you them in the Zone editing tools.

Specifically, under Options->Paths you need to change PATH_ZMS to:
/zm/cgi-bin/nph-zms

(adding the /zm to the front).

Error log messages look like the following:

ERR [socket_sendto( /var/run/zm/zms-299592s.sock ) failed: No such file or directory]

One other issue that could cause similar behavior is not having mod-cgi enabled in apache.

Economies of harvesting Nissan Leaf battery modules

rear_of_car_smushed

I purchased a 2013 salvage (wrecked) Nissan Leaf from the CoPart auto auction house for $4081 (including delivery and fees). I consider this to be a very good price for a wrecked Leaf, but if you stalk a lot of auctions and bid on Leafs that have the most damage you can probably get a similar deal with enough patience.

Then I spent 439$ on the following tools that I needed to move the car around and extract the battery (the largest amount was for jacks and wheel dollies…)

Car Cover (Keep the neighbors happy) 37.1
Wheel dollies & Jacks 243
Bluetooth OBD II scanner 9.98
Leaf Spy Pro android app (to check battery) 14.99
500V gloves   (Safety first!) 21
2 Jackstands (already had 2) 25
Air Impact Wrench & Sockets 46.5
18mm wrench 12.4
13mm deep socket 8.99
21 mm combination wrench 20.69

This puts my total costs at 4520.75 ($94.18 per module) for a 24 kWh battery pack, which is less expensive than if I bought large format prismatic cells.

Of course, with a lot of time and effort, you can sell all of the other parts from the car. Over the course of six months I made back $3180.46 (including the sale of the smallest of the three jacks I had purchased and 0.46 in change I found in the car.) I’m posting this after selling the main body of the car, leaving me with just a few small items listed on ebay. I may earn a few hundred extra dollars over the course of the next several months, but the overall cost recovery is finished.
final_sale

My current total out of pocket expenses (not including lots of labor!) is 1340.29 (or $27.92 per module) which is quite a significant savings over other options for purchasing large format Lithium Ion batteries.

I’ve seen Nissan Leaf modules selling on Ebay for around $130 each with shipping (in larger quantities), so my ~ $30 per module cost is around 21% of the cost of purchasing them on the used market.

To put this cost savings in perspective, purchasing 20 lead acid golf cart batteries to replace my current pack would probably cost me around $2000-$2200, so the Lithium Ion Nissan leaf battery pack was actually less expensive than a replacement lead acid pack!

However, the process of parting out the wrecked car takes a lot of time and effort. If you are just after the battery and can find one for sale at a salvage/junk yard for less than $2500 it would probably be easier to buy the battery alone without the rest of the car. The one advantage of purchasing the whole car is that you can (sometimes) find out how many miles are on the battery pack. In my case, I was able to use an OBDII scanner with the Leaf Spy Pro application to find out that my battery pack health was still at 98% before I removed it from the car.

If I were to buy a whole car again, I would try much harder to sell the entire car (minus battery) in the $2000-2500 range before parting it out and trade some money for my time.

The Nissan Leaf pack weighs about 650 lbs less than the lead acid batteries currently in my truck. They are capable of providing more amps with less voltage sag due to lower internal resistance, and more of the pack capacity is usable as they don’t suffer from the Peukert effect as much as lead acid batteries.

The overall performance of the truck should be much improved. Also the battery life should be much longer than 2 years. (Cycle life for lithium ion batteries is measured in thousands of charge cycles, instead of hundreds of charge cycles for lead acid batteries.)

However, because I am changing battery chemistries, I am also upgrading my trucks’ charging system (and home EVSE) and those costs are actually more than the battery pack, so the total upgrade cost will be more than just getting another lead acid battery pack. (I will talk more about charger upgrade costs in a later post).