Rivaling mill accuracy with a printed template and centerpunch

Using a printed template you can center punch drill pilot holes and rival the accuracy of a milling machine. It’s faster than using a mill, and a lot cheaper as well!

While making the busbars for my Nissan Leaf batteries, I needed to precisely drill holes with 1.3333″ centers. I’m fortunate enough to own a small mill, which I used to drill small pilot holes, allowing me to drill the main holes on a drillpress very accurately.

But what if you don’t have a mill? You can actually get similar accuracy by using a
printed template and careful application of a centerpunch. Just create a template in
a drawing program such as InkScape, Corell Draw, or any other tool that allows you to
lay out lines in a dimensionally accurate way. Print it out on a standard printer, and
then use a center punch to mark the drill starting point on your metal.

center_punch_results

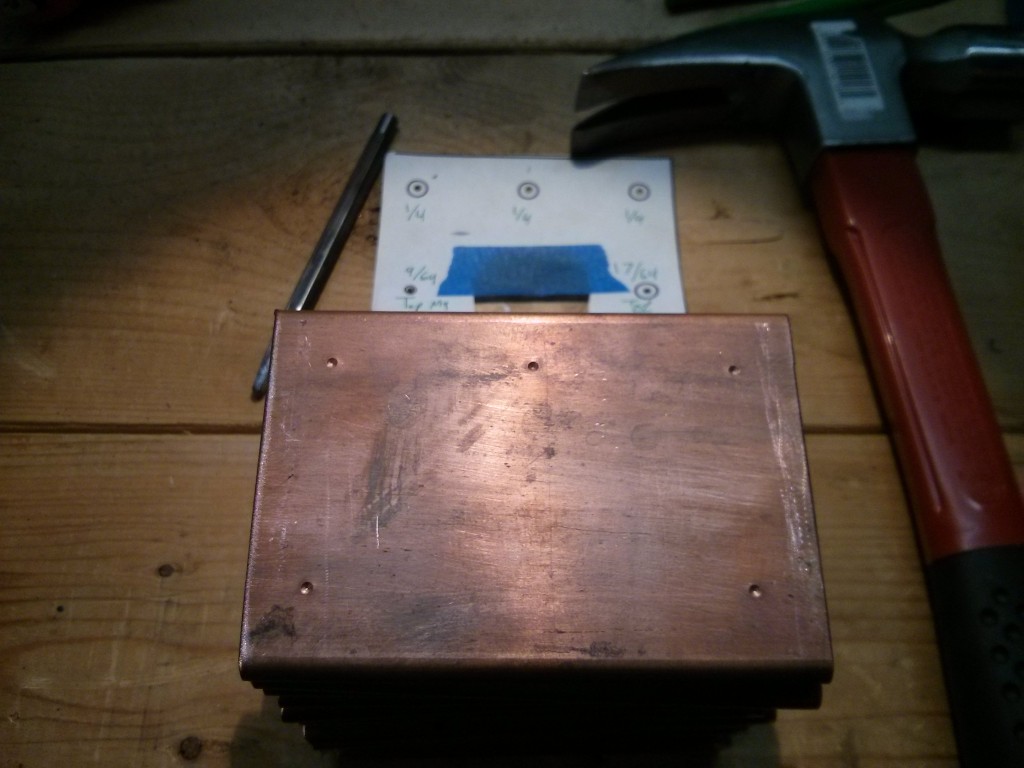
Here you can see me comparing the holes in my milled busbar with the center-punched busbar by passing some bolts through two of the three holes and shooting a picture of the third hole.
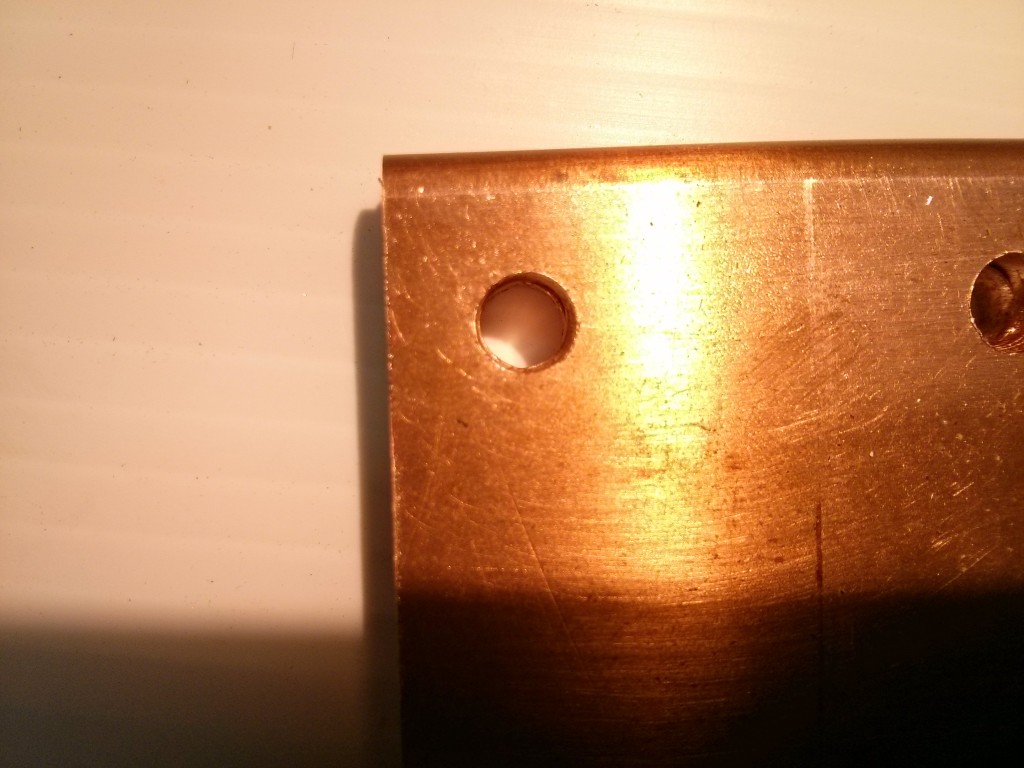
center_punch_to_mill_hole_aligment

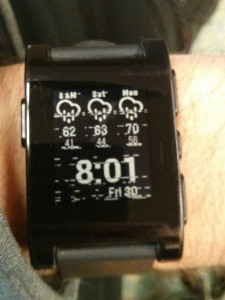
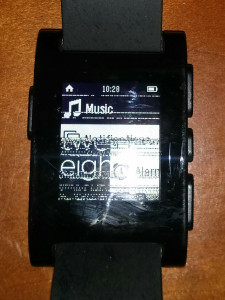
Lines appearing on the display of my Pebble

pebble_screen_corruption_issue2
My original Pebble smart watch (purchased refurbished) started to have a problem where the display would get corrupted. It mostly only occurred when I was pushing a button to change the display, or when my stopwatch/timer was running (updating the display continuously). For day to day use of just wearing the watch, the screen would be normal much of the time.

I thought at first that something was just corrupted in software, so I removed all of my applications, but that didn’t fix it. Then I reset the watch, and that didn’t fix it. Then I rebooted the watch, and that didn’t fix it. Then I reset the watch to the factory default settings with a super hard reboot and reinstall (removing the custom firmware I had installed), and that didn’t fix it. So, I admitted that it was probably a hardware issue, and found this page on the pebble website that talked about “screen issues”.

pebble_screen_corruption_issue

I’ve found lots of information on the Internet that tells me this is a problem with the internal ribbon/zebra cable connector not staying connected properly.

I found this video that tells how to fix the ribbon/zebra cable connection issue by adding toilet paper in the back of the watch to hold it down.

If you don’t like opening your watch, and trust that it is actually water resistant, I also found this youtube video how to try and fix it by putting it into hot and cold water (but that doesn’t fix it permanently).

Luckily for me, I was apparently still within my 90 day refurbished watch guarantee, and Pebble is swapping out my watch for a replacement, so I don’t need to stuff toilet paper in the back of my watch. If you experience this type of issue you should report it to Pebble quickly. It appears to especially plague early Pebble / Pebble Steel watches, I presume they have changed their manufacturing process to keep it from happening to the later ones.

EVSE Install: JuiceBox Pro 40

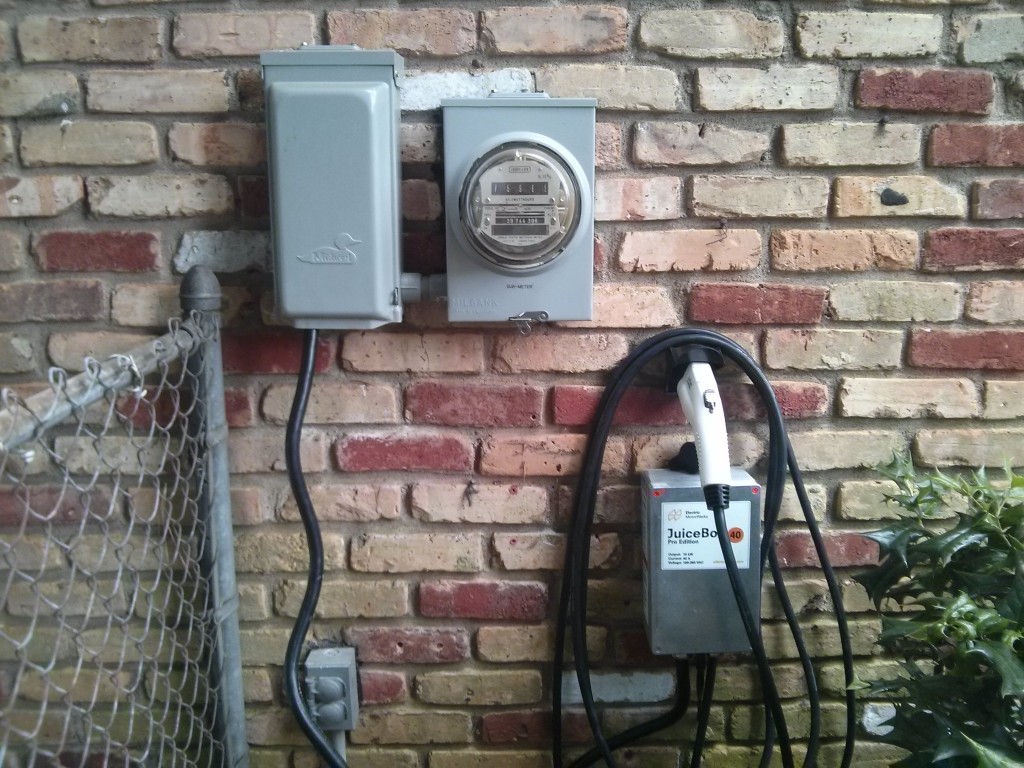
JuiceboxInstalled

This is my new J1772 EVSE, a JuiceBox Pro 40 (Amp) unit. Georgia Power is offering a $250 rebate for installing a Level 2 EVSE with dedicated circuit this year. I already had the dedicated NEMA 14-50 (50 Amp) circuit previously installed for electric truck charging, and since the JuiceBox plugs into a NEMA 14-50 outlet, installation was as simple as anchoring it to the brick wall of the garage (with concrete screws) and plugging it in.

I especially like the small plastic cable and “gun end” management system which is screwed to the wall above the JuiceBox. Continue reading

How to recycle in Barcelona

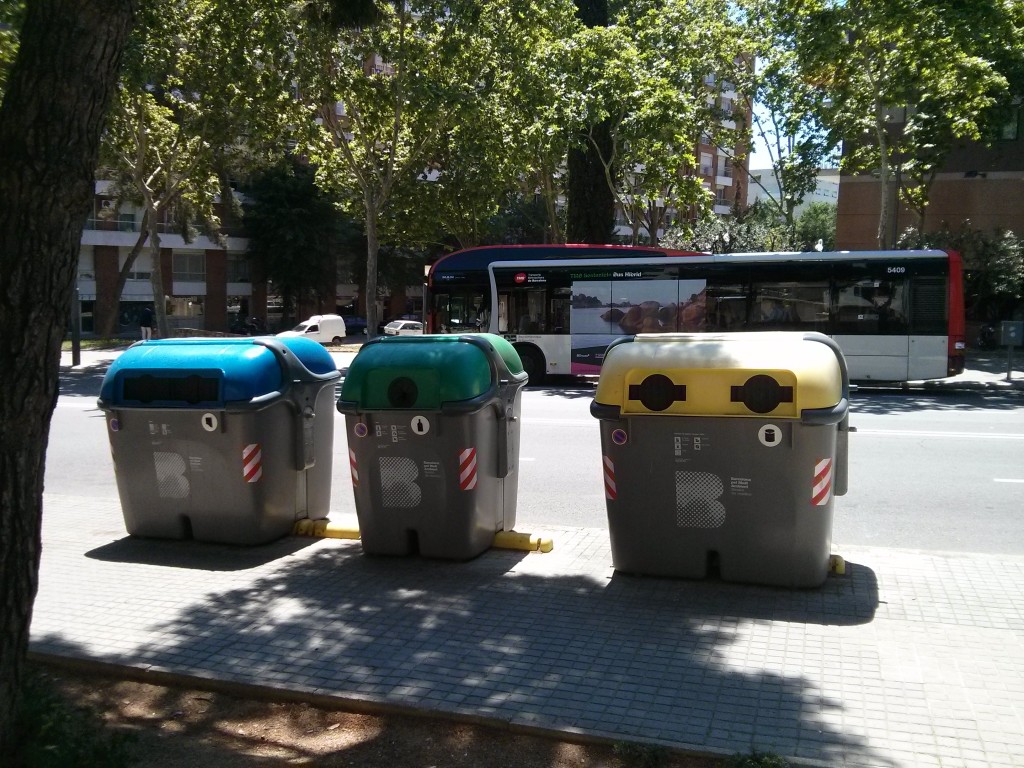
Barcelona has many curbside recycling bins that are color coded.

barcelona_recycle_bins

The blue bins take paper, magazines & cardboard (folding boxes), but NOT the plasticized cardboard juice and milk boxes. (Which go into the yellow plastic bins instead. Also, no tinfoil, because it’s metal, not paper!)

blue_paper

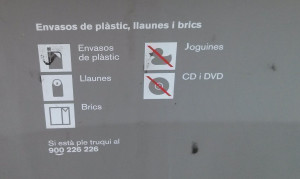
The yellow bins take all types of plastic, including plasticized juice and milk boxes, but don’t throw in plastic toys or DVD/CD-ROM’s. They also take metal cans (I’m not sure if this is just aluminum cans, or all types of metal cans.)

yellow_plastic

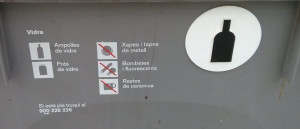
The green bins take all types of glass, but no metal lids or lightbulbs, or ceramics.
green_glass

The brown bins are for organic remains (think compost), and all of your regular trash goes into the light gray bins. Currently very few people in Barcelona actually recycle, and most just throw all of their trash together into the gray bins.

It’s Alive!

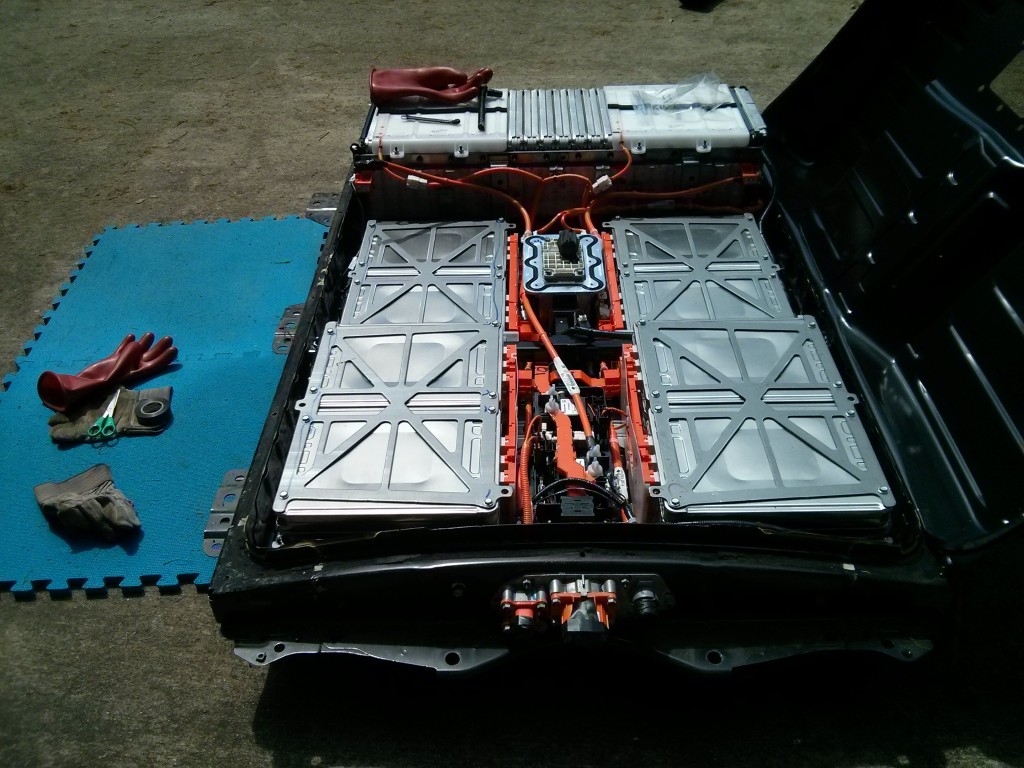
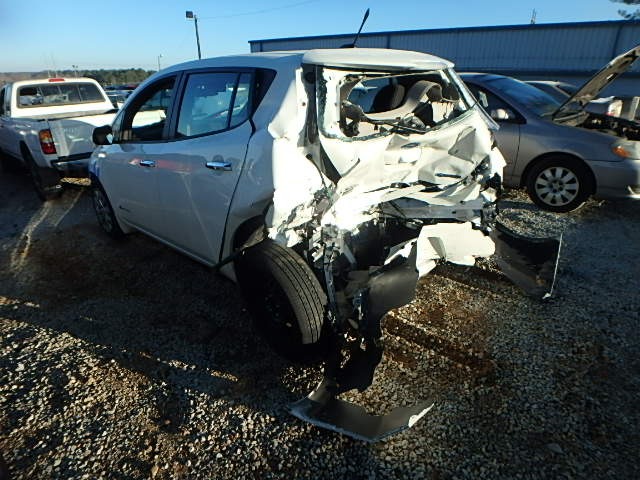
I was able to move the leaf under it’s own power (using two of it’s own wheels as well…) I titled the video “Drifting the rear end” because I want to see how many racing enthusiasts I can troll. This is probably the last time this Leaf will move under it’s own power, as the next step is to drop the high voltage battery pack.

AT&T U-Verse upstream speed bump in June

I have an AT&T U-Verse “Internet Pro” DSL account. In the middle of June (near the 13th) my latency suddenly improved by 10ms.
latency

Then around the 19th of June (2014) my upstream bandwidth jumped from around 1 Mb/s to around 1.4 Mb/s:
upstream

AT&T doesn’t advertise or make any promises about their upstream bandwidth, but these are welcome changes (especially the 40% boost in upstream bandwidth). My downstream bandwidth stayed just above the advertised 3 Mb/s rate.
downstream

I don’t know if this was due to a piece of equipment near my home getting upgraded, or the result of a policy change to upgrade the “Internet Pro” account, but I’ll take it!
Anybody else see a similar boost? Or have a negative counter example?

OneTesla O-scope traces

I have reduced my primary to 5 turns, and using the standard 0.068 MFD tank cap, this is the general shape of my oneTesla output waveform (as captured by a scope probe hanging in the air about 3 feet away from the coil):
Screen Capture

As you can see, the primary rings up and then the secondary oscillates for quite a while afterwards.

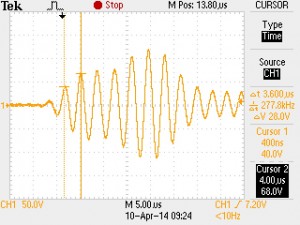
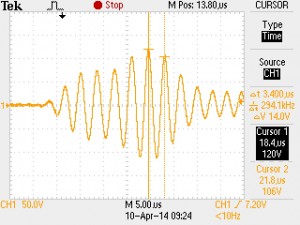
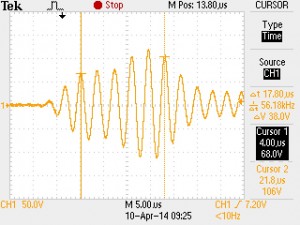
The next three traces are running the coil at a very low power level. Depending upon where I measure between peaks on the trace, I get different frequencies:

Screen Capture
277 kHz

Screen Capture
294 kHz

Screen Capture

17.80 uS between five peaks, or 1 / (3.56 / 1000000) = 280 kHz

As the 280 is between the 277 and the 294, we’ll just say that my primary has a resonant frequency of 280 kHz, when at low power.

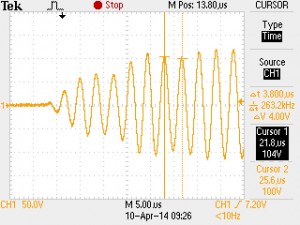
Next, I turned the power up a bit (around 1/3 of the way up) and got the following two measurements:

Screen Capture
263 kHz

Screen Capture
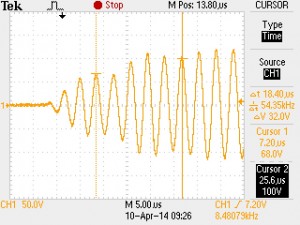
18.40 uS for 5 peaks, or 1 / (3.68 / 1000000) = 272 kHz

So my primary resonance is somewhere between 263 and 294 depending upon how I measure it, with a value of 272-280 looking to be a reasonable average.

Surprisingly, my secondary resonance measurements agreed with themselves a bit better. Here is the low power trace:
Screen Capture

And the “Mid Power” trace.
Screen Capture
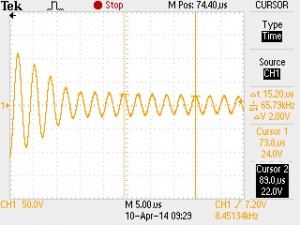
(You can see the primary ringing extending out so that it becomes visible in the trace…)

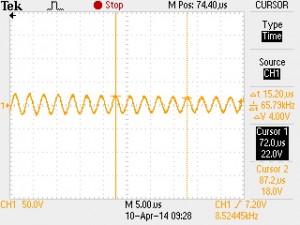
In both cases, I measured 15.20 uS between 5 peaks or
1 / (3.04 / 1000000) = 329 kHz

So my ratio is currently 329 / 280 or 1.175 ( Secondary 17-18% higher than my primary).

Using a Raspberry Pi as a RepRap print host with webcam

I set up a Raspberry Pi as a print host for my RepRap (using the Pi Camera Board as a webcam to view the print status). Here are my summary steps:

  1. Install Rasberrian and update it.
  2. Configure your system to enable wifi (if used) and camera board (if used) and enable the SSH server if you want to remotely administer the pi board using the “sudo raspi-config” command (you may also want to tweak your overclocking settings here, I’m using “Moderate”)
  3. Install OctoPrint following directions here: https://github.com/foosel/OctoPrint/wiki/Setup-on-a-Raspberry-Pi-running-Raspbian
  4. If you have a camera board, you may need to update your pi firmware (sudo apt-get install rpi-update; sudo rpi-update)
  5. To get the camera board set up as a streaming webcam, install mjpg-streamer experimental version from here:
    “git clone https://github.com/jacksonliam/mjpg-streamer”
  6. You can compile it on the Pi using these instructions:
    http://www.instructables.com/id/Create-an-internet-controlled-robot-using-Livebots/step5/Get-the-webcam-streamer-for-Raspberry-Pi/ (ignoring the step to download from sourceforge.net)
  7. Install the plugins to /usr/local/lib with “sudo make install”. Copy the www directory to the same location.
  8. Start the webcam streamer: mjpg_streamer -o “/usr/local/lib/output_http.so -w /usr/local/lib/www” -i “/usr/local/lib/input_raspicam.so -x 640 -y 480”
  9. Start OctoPrint (“OctoPrint/run”)
  10. Test it by pointing your browser to your raspberry pi’s IP address, port 8080 for the mjpg-stream and port 5000 for OctoPrint
  11. When all that works, put some commands in your /etc/rc.local file to start them both up whenever your Pi boot sup. I used: su pi -c ‘/home/pi/OctoPrint/run’ & AND su pi -c ‘/usr/local/bin/mjpg_streamer -o “/usr/local/lib/output_http.so -w /usr/local/lib/www” -i “/usr/local/lib/input_raspicam.so -x 640 -y 480” ‘ &

My Thoughts: Everything works great on a wired (ethernet) connection, but my wifi adapter is performing extremely poorly for streaming video of the printer. Also, why can’t the camera board just have V4L support out of the box?