I’ve been using my DWARF II (Dwarf 2) smart telescope for a few months now and feel like I mostly know what I’m doing. Here are common questions I see on the user’s forum with my answers.
What’s the first thing I should do?
Remove the plastic film that protects both the cameras in shipping, the image quality is better that way. Then put it on to charge before nightfall.
Best first target?
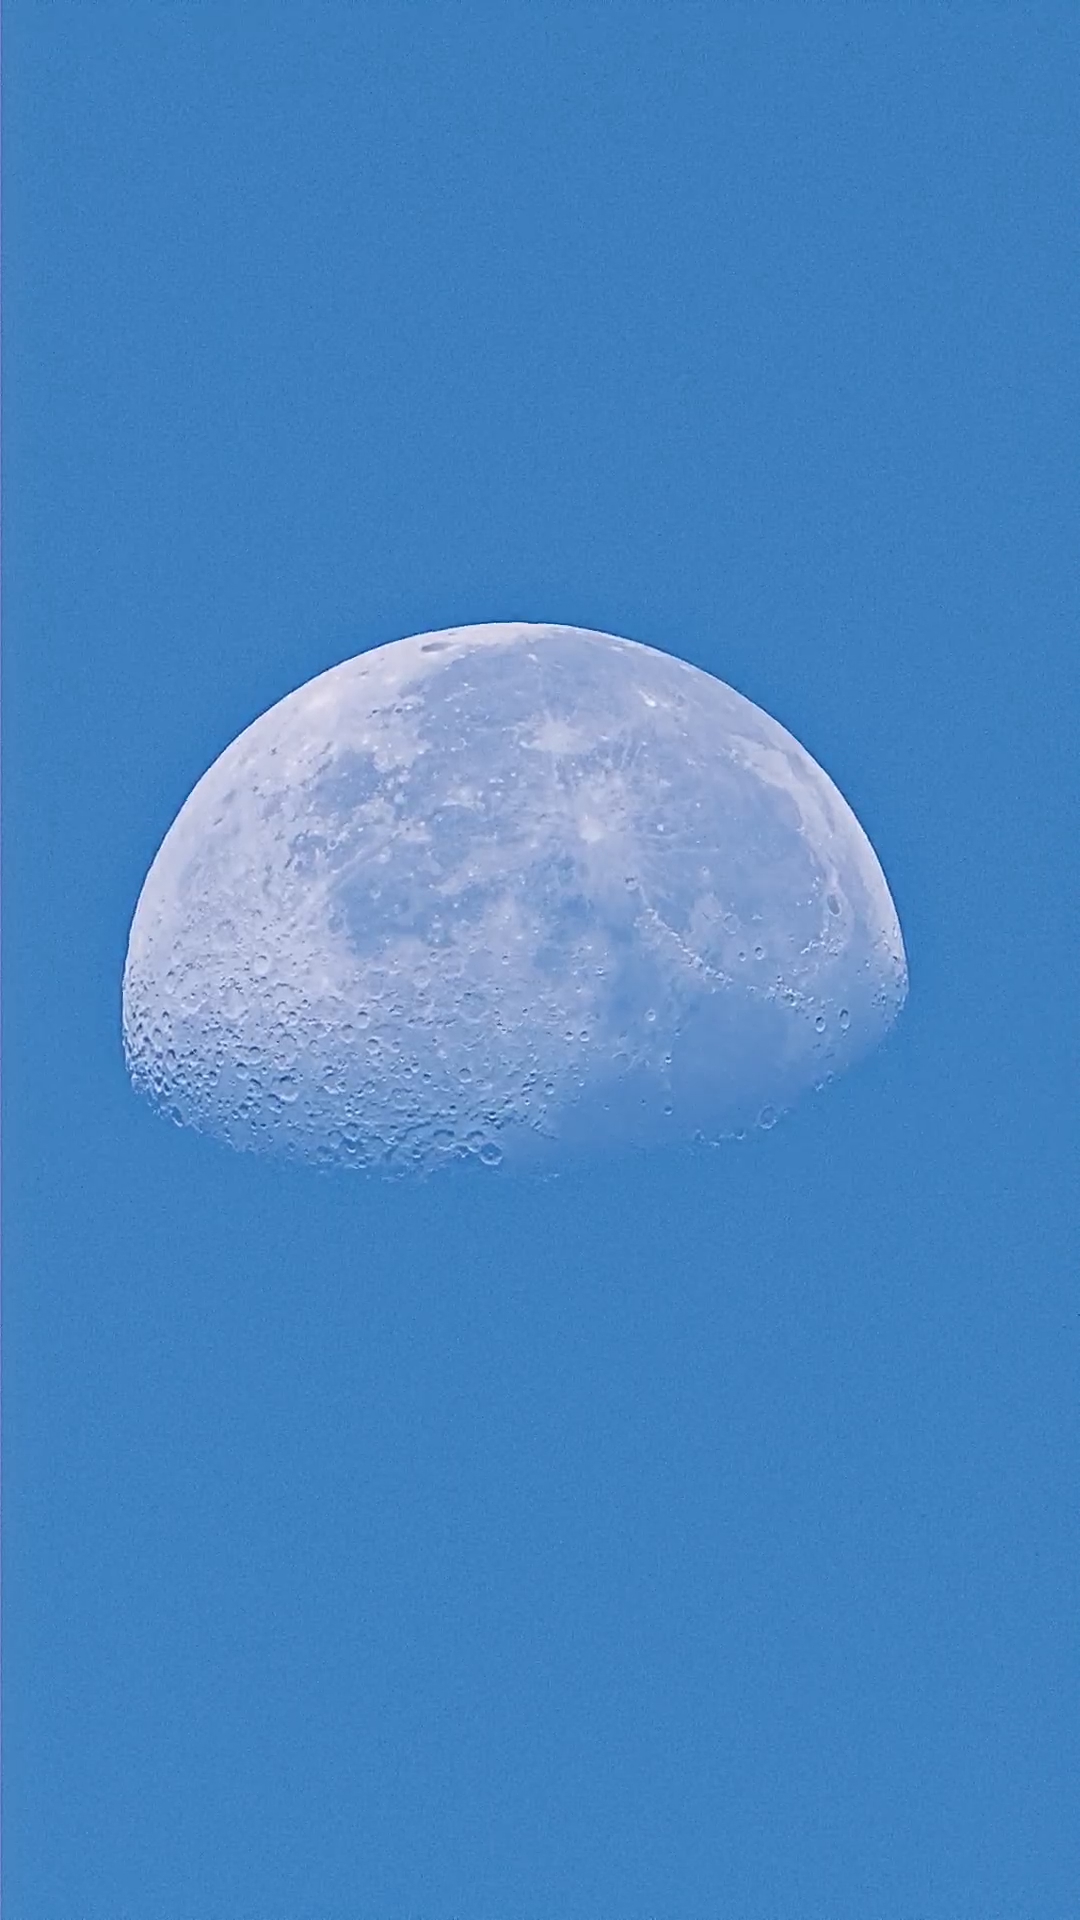
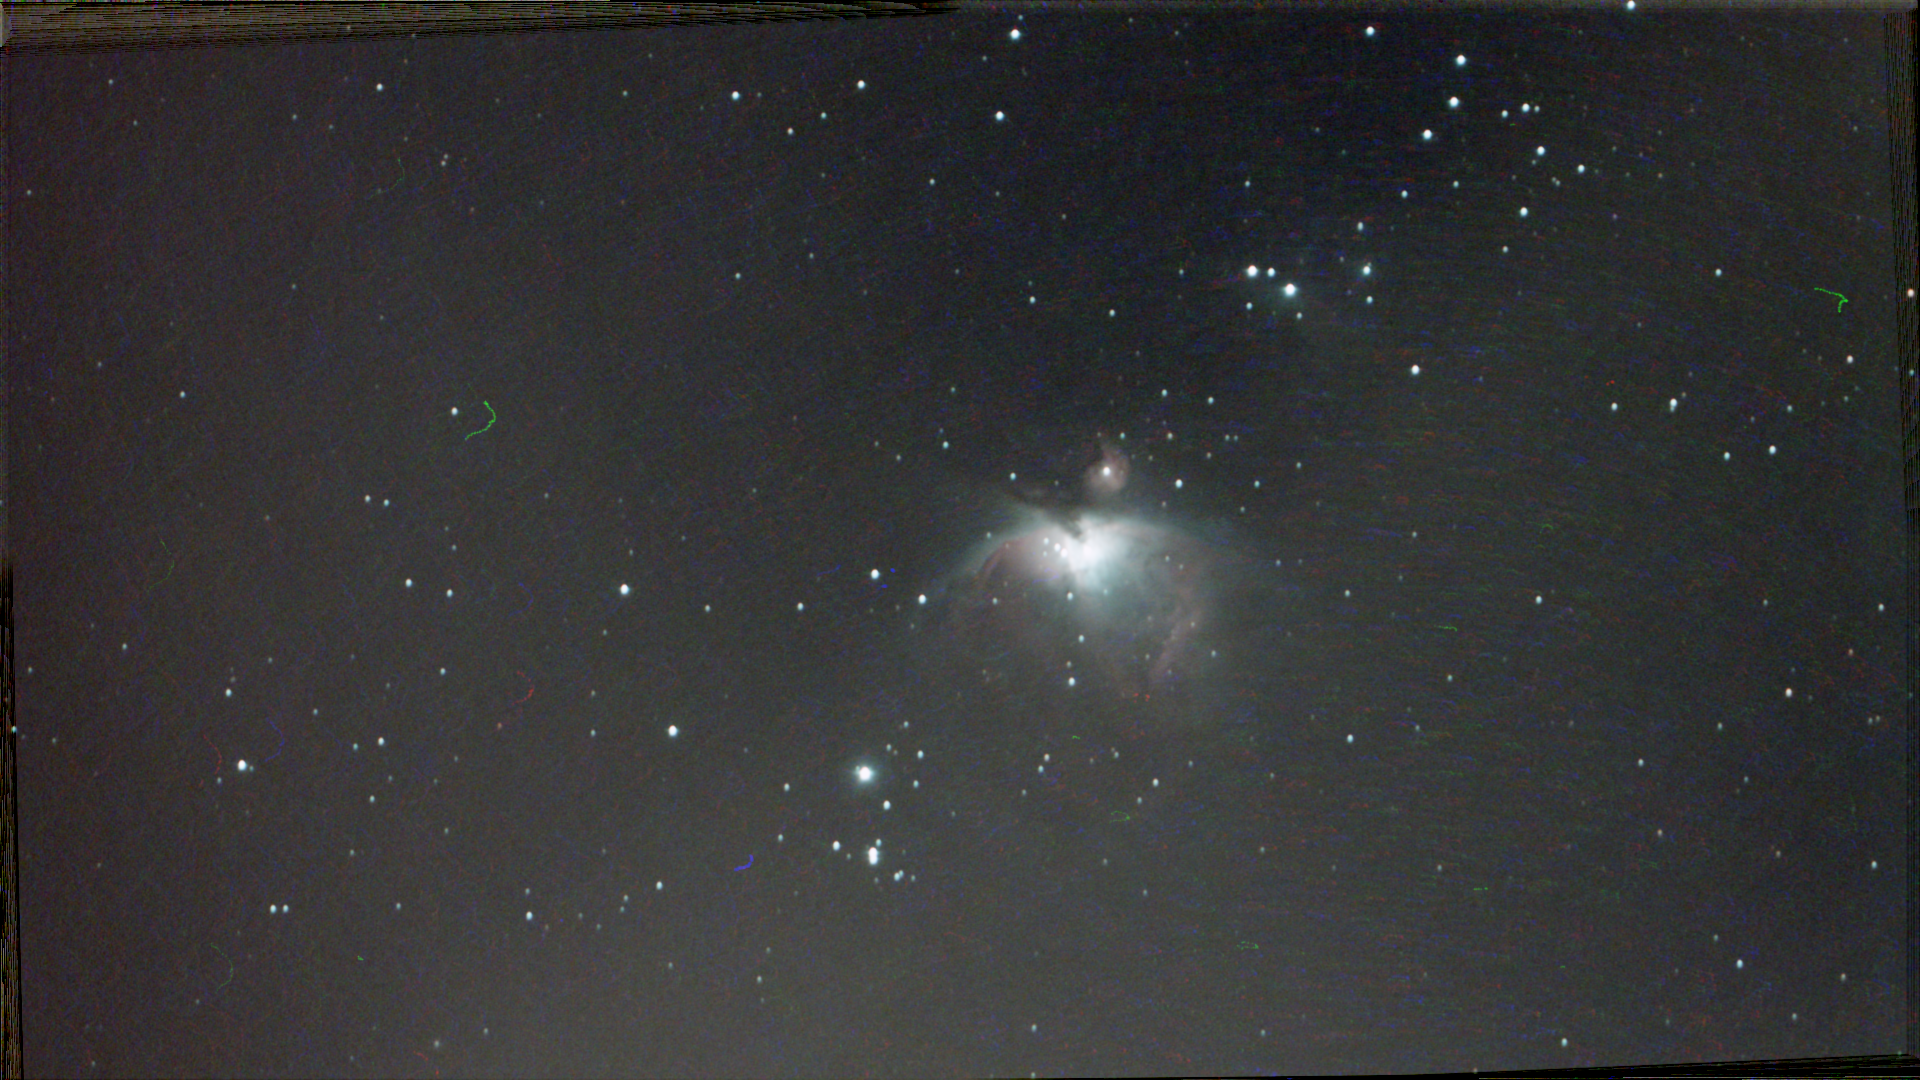
If you are in the Northern Hemisphere, I recommend the M31 Andromeda Galaxy or M42 the Orion Nebula as your first “target”. (Use a phone app such as SkySafari or SkyView to confirm you have a clear view to your target first…the Dwarf app doesn’t really do a good job of letting you know what is currently visible in the sky.)
Both of these targets are relatively large and bright, so you should be able to image something even in city glow. Here is what my Dwarf was able to do all on it’s own, without any post processing (click image for full size):
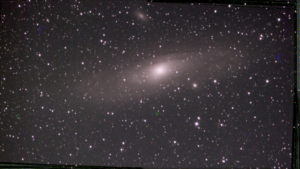
M31 Andromeda Galaxy, 198 stacked shots, 10 sec exposures, gain 40
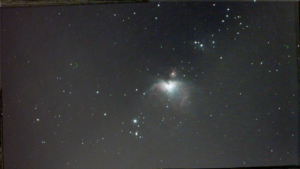
M42 Orion Nebula – 47 stacked shots, 15 second exposures, gain 50
Astro-mode Calibration
For plate solving / calibration to work, the DWARF needs to be able to see a good number of stars in sharp focus. You should check/set the telephoto settings (try 1 second exposure and a gain number that leaves the background still mostly dark, but shows stars well) and then make sure the stars are small dots [using the [+][-] focus buttons, and/or a Bahtinov mask if you like to be super precise….]
NOTE: You MUST remove all filters before using the calibration procedure, as it turns the Dwarf’s tube all the way to the “zeroed” position facing down, inside the body of the telescope, and the filter holder would prevent this motion.
Then, pick a “good” starting position. When the Dwarf does it’s calibration, it zero’s out the two axis (hitting the end stops) and then navigates back to ALMOST where you had it set up at. (the place you set it up at is image number 2, it takes one image 5-10 degrees to the left, and a 3rd image 5-10 degrees to the right. If all three images get enough stars to plate solve successfully, the calibration is done. However, if ANY of the images don’t work (trees, clouds, not enough stars) it will keep trying to take more images as it moves to the right (4,5,6,7,8, up to 9 total).
So, when you pick a starting position, make sure it has stars, and then scroll the dwarf to the left and the right to make sure both adjacent positions also have good views of stars. (Favor more stars to the right after that, as it never goes left more than 1 image from the starting position).
When it does it’s plate solving, you should see “streaks” of stars while it is moving, and at least one image with dots for stars for each of the 1,2,3 plate solving attempts. If you can’t see star streaks when moving or dots when shooting, the exposure time or gain or focus is wrong.
Also, very rarely I have had it “calibrate successfully” but STILL not have the right calibration (early in the evening when you don’t have many stars….it finds a solution that is under-constrained / wrong but still thinks it knows where it is….GOTO the moon or a known object to test to make sure the calibration worked correctly before depending upon it. [or at least watch the first few stacked images to make sure the object you are imaging actually appears in it before walking away…]
Telephoto aiming rectangle mis-calibration
Because the telephoto lens and the wide angle lens are separated by 4 inches (have parallax) the area inside the rectangle in the wide angle view may or may not correspond to the field of view of the telephoto lens, depending upon the distance to your target.
To fix this, have the wide angle lens view be large (with the telephoto view in the smaller picture-in-picture mode). Then, you can press and hold your finger on the rectangle, and drag to move it around the wide angle view. [I suggest you use the joystick to aim the telephoto view at something that is distinctive in the wide angle view, such as the top of a utility post, or recognizable star.]
This calibration should be “good” for objects of the same distance, but if you calibrate it with a close up object, it won’t match up for “infinite” field of view objects like stars.
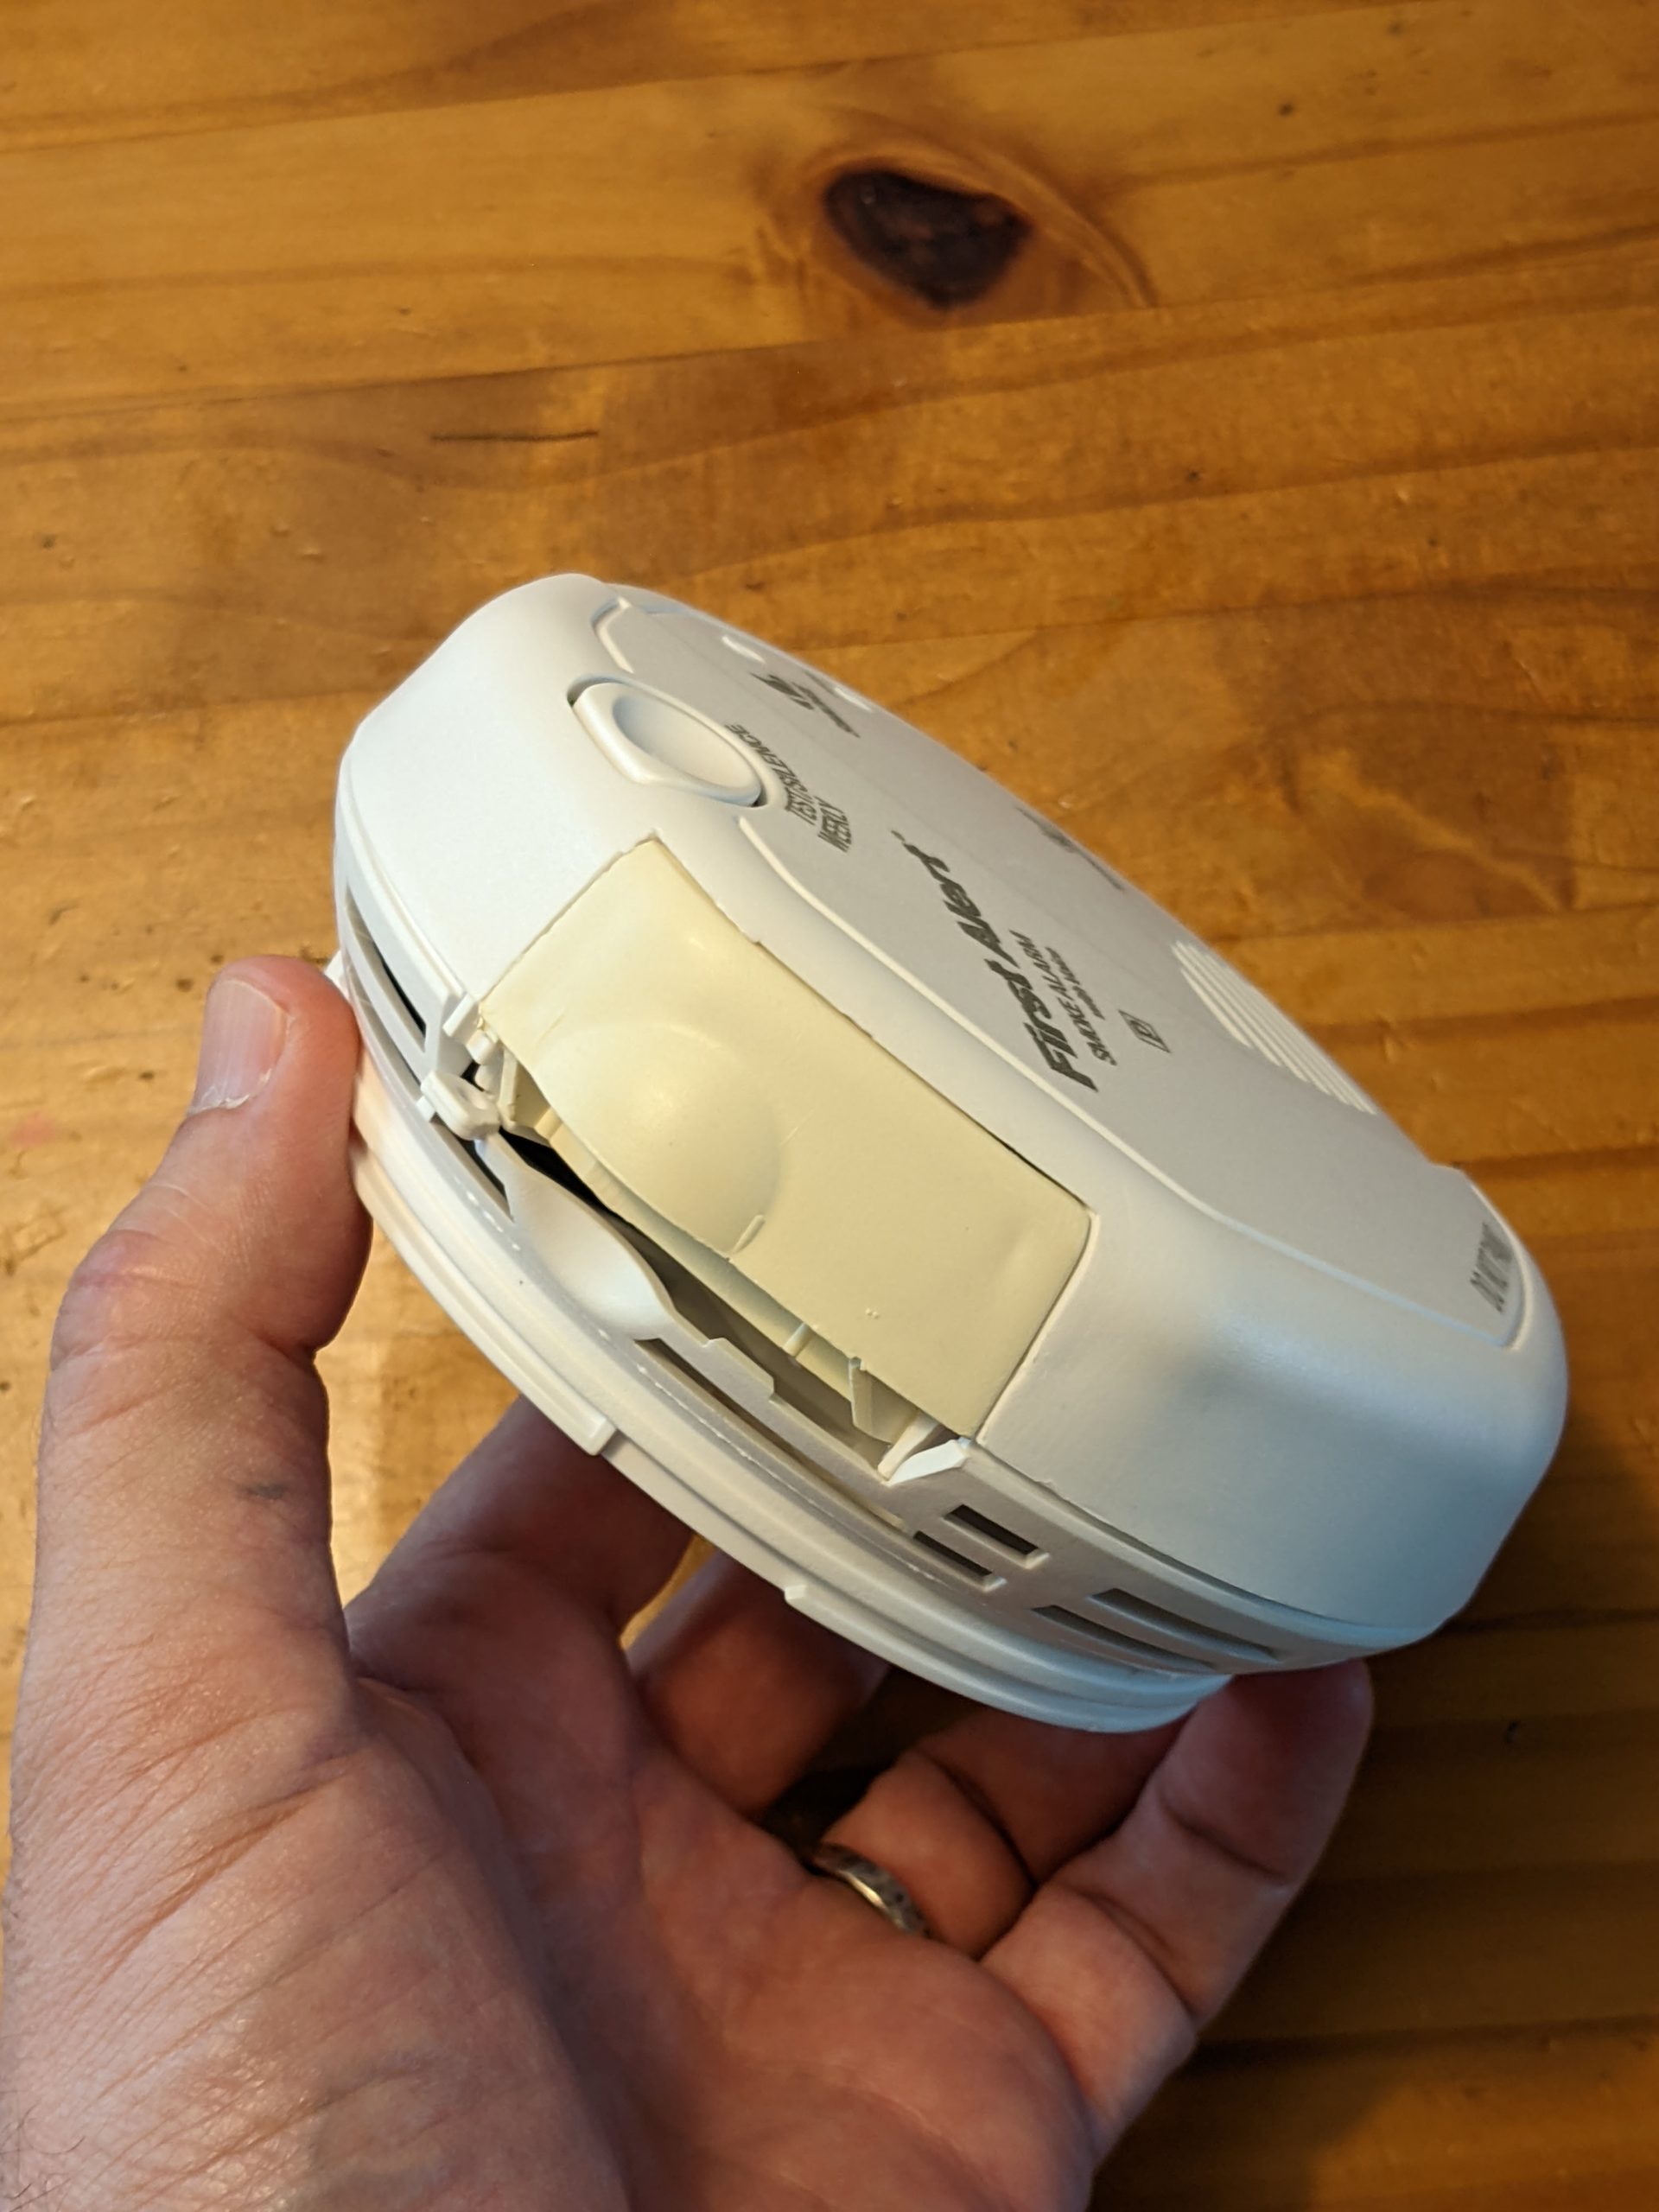
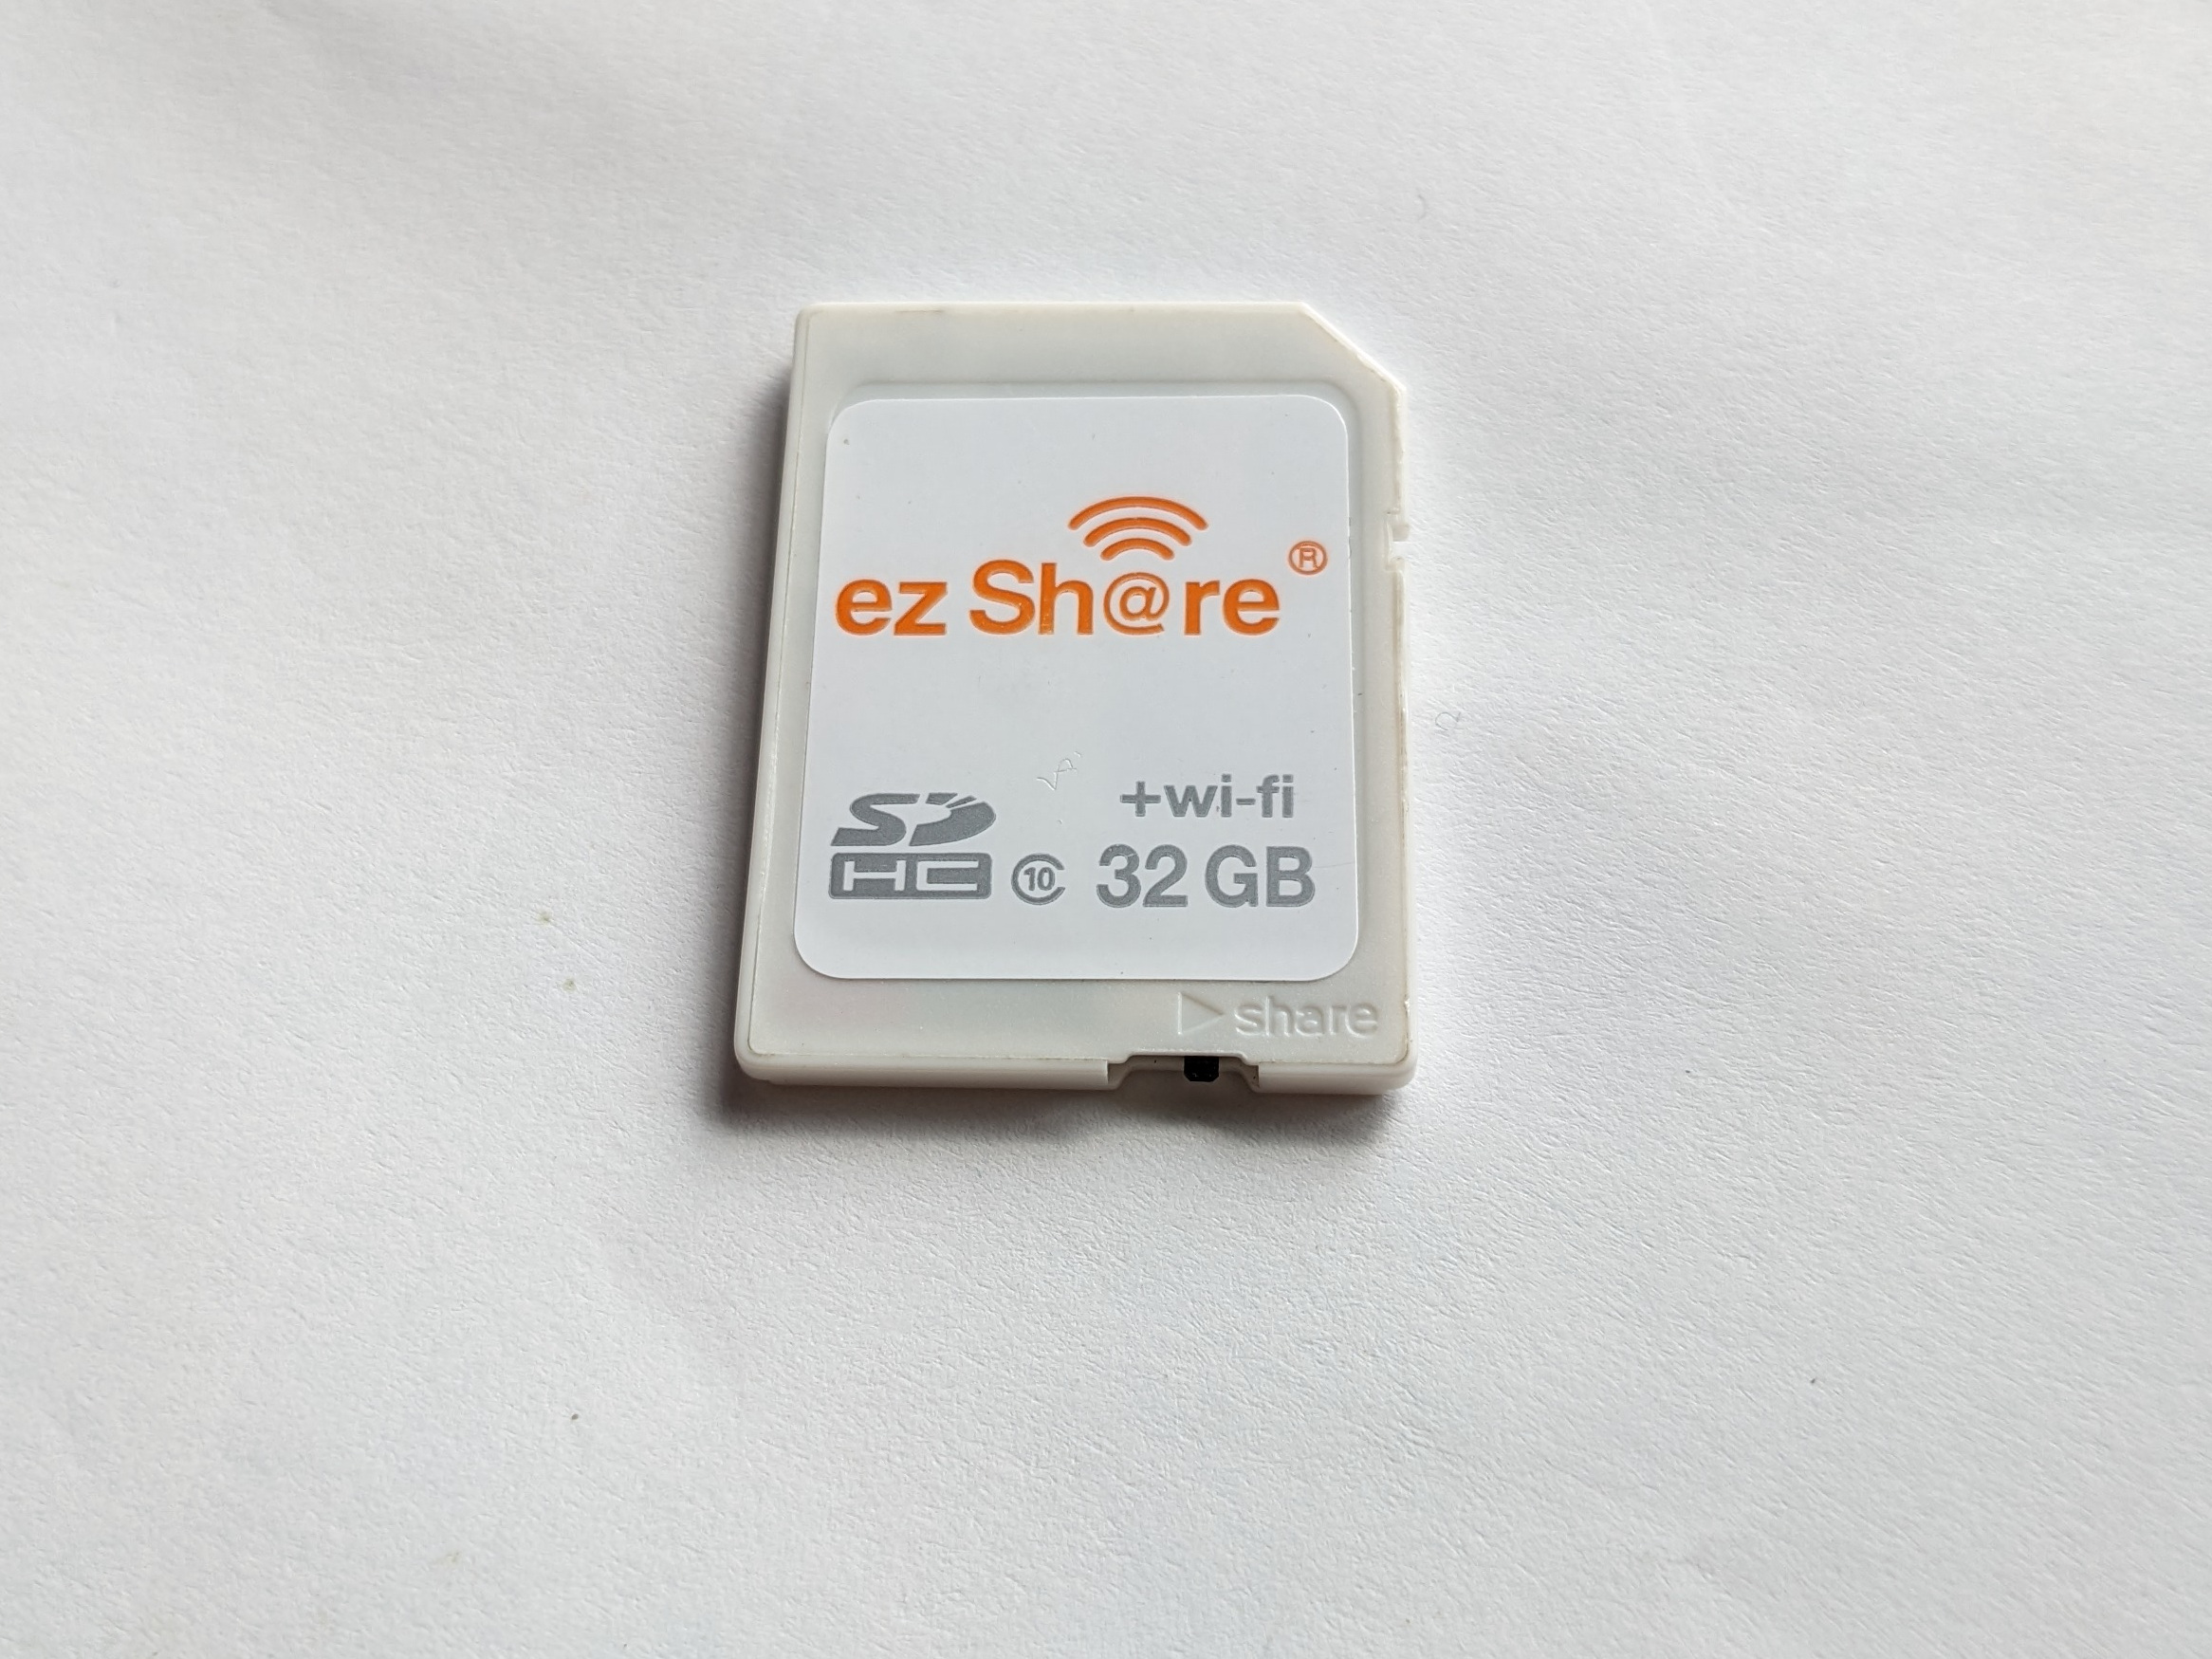
MicroSD card “upside-down” orientation
The micro-sd card orientation is “upside down” from what you might expect it to be. Pay very special attention to the icon of the SD card and which way the small cutout on the card is facing when you insert it.
Rubber Micro SD card cover not fitting
If you pull out the rubber cover for the Micro SD card, you will find that it is attached to the Dwarf 2 with a thin cylindrical piece of rubber (attachment string) that comes out of a hole. If you pull it out too hard, the cylindrical rubber bit may not want to go back into the hole, and the rubber plug may not re-insert correctly, which will block the rotation of the telescope tube when the Dwarf tries to calibrate. To fix this, you have to carefully push the cylinder of rubber back into the hole, either by using a pair of tweezers, or by carefully pushing using the rubber plug near the cylinder. Some careful maneuvering should get it to slide back into the hole. Once the cylinder is sliding freely back into the hole, you will be able to re-insert the micro SD card cover.
Polar or Equatorial or EQ alignment
The Dwarf 2 is designed to be mounted on the level, and its two motors act as an Altitude / Azimuth (Alt/Az or pan/tilt) head. [The entire telescope rotates around the small base to provide Azimuth control, and the telescope tube rotates to provide Altitude control.]
It works fine in this configuration, and it uses it’s alt/az drive to track the current object of interest. But if you are taking a large number of images, due to the rotation of the Earth, the subsequent images are slightly rotated from the first image, even if the target stays in the center of the frame. This is called “Frame Rotation” and results in not having a full set of images for the outside edges of your image stack. [And requires any software stacking solution to apply a corresponding “anti-rotation”.]
You can mostly resolve this issue by mounting the Dwarf2 telescope with the axis of the base (azimuth axis) pointing in the same direction as the Earth’s axis of rotation. In the northern hemisphere, the easy way to do this is to align the Dwarf 2 with Polaris (the north star). This can be done with a tripod head that tilts at least the number of degrees of latitude of your location. [There are several 3D printed aiming devices to help you, or you can just tape a drinking straw to the side of the Dwarf.] If you want to know how to do this, I recommend this video: https://www.youtube.com/watch?v=X9rIk6skTU8
The questions are then….but will the DWARF work correctly in this “non-level” configuration? Will this hurt my Dwarf, or void the warranty?
Many people, including myself, are using the DWARF 2 in polar alignment successfully, so it does work and helps to reduce field rotation. So far I have not heard of any reports of a DWARF 2 failing because it was used in polar alignment, or of DwarfLabs denying a valid warranty claim due to usage in polar alignment.
However, you should know that early models of the DWARF 2 had an issue where the base plate could break off of the base. As the base plate is where the tripod nut is mounted, this could cause the entire rest of the telescope to fall to its doom. [Dwarf Labs has published a technical note explaining how to fix this yourself if you have one of the early models.] This is due to a design flaw (the plastic that the base plate screwed into was not strong enough for the potential forces). The factory has “fixed” this issue by using a glue to adhere the base plate to the bottom of the Dwarf as part of the assembly process. However, I am still suspicious of the overall strength of the tripod nut and base plate, so I use a 3D printed “support bracket” with my Dwarf. It is called the “Dwarf 2 Base Plate Saver“. With this bracket, which distributes the load around the entire base of the Dwarf, I do not worry about mounting it in polar alignment.
The azimuth motor has worked perfectly fine for me, even with my Dwarf at a 28.5 degree tilt. As the weight is nicely balanced, I expect it would work very well, even with the dwarf at a much more inclined angle, so motor strength does not appear to be an issue. There is a potential issue of the axis bearings not being designed for off-level operation, but so far I have not noticed any issues that I can attribute to non-level mounting.
Post Processing Software for Linux
If you want to spend money and get the best result, Pix Insight (and related plugins that cost more money) is the way to go. (There are a few other paid software that only work on Windows, but at least Pix Insight is cross platform.)
I have not spent any money, and am using the Open Source SIRIL software instead.
There are a lot of videos about how to use SIRIL on YouTube…but this one is Dwarf 2 specific and also shows off Pix Insight.
Both pieces of software have a steep learning curve, but post-processing off of the DWARF can improve your final result significantly. For example, here are my results post-processing data from the two example images above using SIRIL (click for full size):