Making Thunderbird send messages in the background (like Outlook)

My work recently changed over to using Office365.com for their email. As long as Office365 supports IMAP and SMTP (it does) I don’t mind so much, as I can continue to use Thunderbird on my desktop to access my email.

However, because the mail servers are no longer located “on-campus” the lag to the SMTP server is much more noticeable than before. When I pressed the “Send” button, Thunderbird would sit there for 20 seconds with a progress bar sending the mail, interrupting my flow of email processing much more noticeably than when the server was hosted on the same network.

So I tweaked a few advanced settings in Thunderbird by going into Thunderbird Preferences (Edit->Preferences), clicking the “Advanced” tab, then selecting the “config editor” button and promising to be careful. [Newer versions of Thunderbird have these options under the tools -> Options menu. ]

mailnews.show_send_progress false
mailnews.sendInBackground true
offline.send.unsent_messages 1

Telling thunderbird to not show the progress indicator only hides the dialog, but the compose window still sits up on your screen (with no visible indicator of what it’s doing) until the mail is sent, so you also need to turn on “sendInBackground” to make the compose window disapear immediately after you press send.

This makes the message go immediately to your Local Folders -> Outbox, but DOES NOT SEND IT, until you select File -> Send Unsent Messages. Hence the “offline.send.unsent_messages 1” which tells Thunderbird to send unsent messages (from Folders -> Outbox) whenever it can. It still takes 20-30 seconds for the message to be sent, but it is done in the background now.

How I melted my ANOVA Precision cooker

anova_melted3

anova_melted2

I purchased an ANOVA precision cooker (a Sous-vide immersion heater) via their Kickstarter almost a year ago and have been having fun cooking things in water baths. (It makes cooking salmon so very easy….)

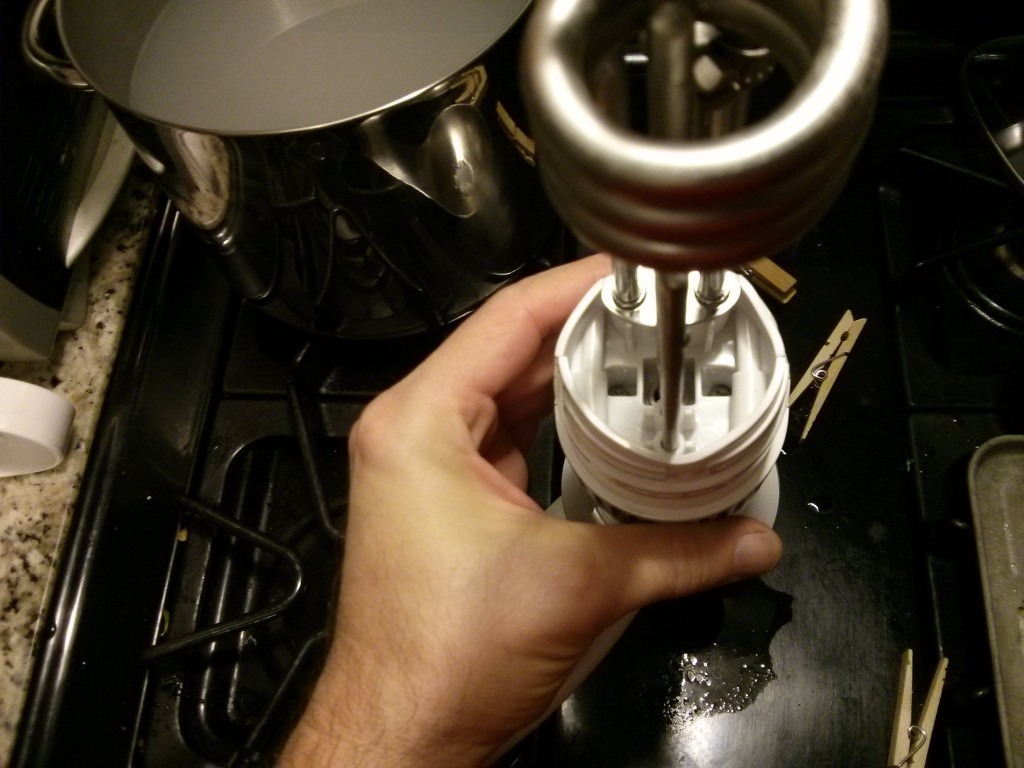
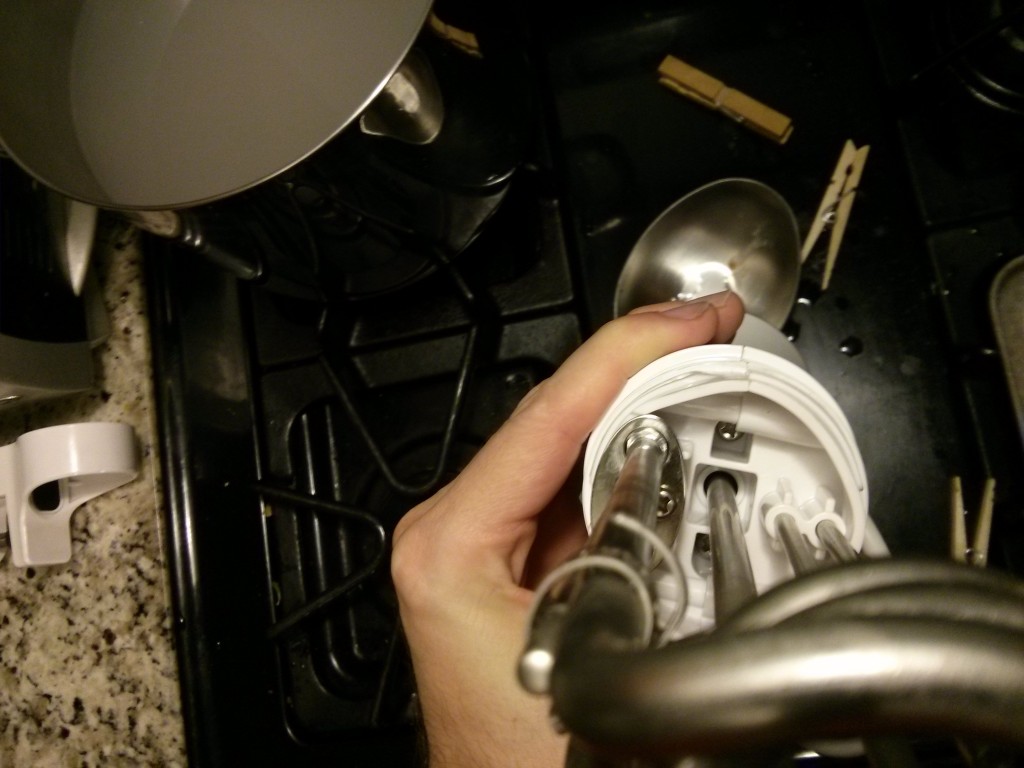
My wife told me about a recipe where you simmer a can of sweetened condensed milk in near boiling water for three hours to make Carmel. After my initial “But won’t it explode?” questions were answered (don’t use a pop top can and you are supposedly explosion safe…) I checked my ANOVA’s manual, and sure enough, it listed the Max temperature at 99 C, perfect for keeping water at a very low simmer without having to keep an eye on the range…[1].

Little did I know, the ANOVA can’t actually take being exposed to steaming water for 3 hours. Continue reading

Original Pebble Review + Application / Watchface Recommendations

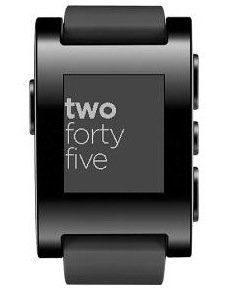
pebble_jet_black
I finally jumped on the “SmartWatch” bandwagon (after the CST – “World’s Thinest Watch” Kickstarter I’d been waiting on for two years finally gave up the ghost) purchasing a refurbished (Jet Black, original plastic) Pebble for $60 from Meh.com.

I can’t imagine paying $300+ for an Android Wear or apple Smartwatch when you can get the original Pebble’s new on ebay and discount websites for $50-$60. It does everything you really want a smart watch to do, at a fraction of the price.
Built in features I use and love:
Continue reading

Using rsync to selectively restore a backup (with/without dotfiles)

If you have backed up your entire home directory, and are restoring it onto a new computer, sometimes you do not want to copy over all of the .dotfiles (hidden files and directories that start with a period) in your home directory. This can be especially useful if you are upgrading the operating system version and many applications are also upgraded, and you want to re-configure them manually.

To restore everything BUT the .dotfiles in the main root directory you can use the following rsync command (the command must be executed from inside the backed up home directory):

rsync -av - --exclude="/.*" ./ /home/NewHomeDir

Note that this WILL copy all .dotfiles in directories under the main home directory.

I do recommend keeping all of your old home directory dotfiles in a separate “dotfile” directory, because invariably you will need something from in them (such as an SSH private key, GPG key, etc…)

You can copy JUST the .dotfiles from the home directory (including recursing into .dotdirectories) with the following command:

rsync -av /path/to/sourcedir/.??* /path/to/dest

The .??* selects only files/directories in the sourcedir that start with a dot. Note that .* alone would select ALL files and directories in the sourcedir.

HOWTO: Full Disk encryption on Ubuntu 12.04

How to set up an entirely encrypted disk using Ubuntu 12.04 (LTS):

Use the Alternative installer (text based) ISO image so that you have access to the LVM and Encrypted Disk options.

Assuming you want to keep a windows partition or some other pre-existing partitions intact, you will have to manually partition things instead of using the guided partitioner, so select “manual”.

Set up two partitions. One will be your /boot partition and should be around 250MB. This is the only data that will be unencrypted on the disk. The other will be your encrypted volume, that will hold an LVM physical volume that will contain all of your other partitions such as your swap partition, / (root) partition and any /home /var etc partitions that you want to set up. You should select “Use as:” “physical volume for encryption” when setting it up.

Then go back up to the top of the menu to the “Configure encrypted volumes” option (You may have to write changes to the partition table before you can do this.) Use the “Create encrypted volumes” option, and “check” / select the large LVM partition you just created. Then select “Finished” and it will prompt you for a pass-phrase.

Now, go back up to the top of the menu to the “Configure the Logical Volume Manager” option. This will prompt you to write changes to disk, and create an encrypted volume (defaults to using ext4).

Now, go back up to the top of the menu to the “Configure the Logical Volume Manager” option. Create a volume group (vg0 is as good of a name as any) on the /dev/mapper encrypted volume you created above.

Create a logical volume (I named mine “swap”) that will hold your swap partition. It should be at least as large as the maximum amount of RAM you ever intend on installing in your computer if you want to use suspend to disk (hibernate).

Depending upon how many other partitions you want (one big root, or /home and /var, etc”¦) create other partitions using the rest of the space inside of your LVM volume group, and select Finished.

Once you leave the LVM configuration area, you will see all of the LVM logical partitions that you have created. Select each of them and configure their mount point and file system type. (or use as Swap in the case of your swap partition.)

Write everything to disk (which will also format partitions) and you are ready to continue with the rest of your installation!

Thinkpad X31 – PAE cpu options with newer Linux Kernels

The Pentium M CPU that comes on IBM Thinkpad X31 laptops (circa 2003…) claims to not support PAE (Physical Address Extension ). Luckily however it DOES support PAE if your kernel forces it, which you can do by following the instructions here:

https://help.ubuntu.com/community/PAE

They explain: “A number of older Pentium M processors produced around 2003-4 (the Banias family) do not display the PAE flag, and hence a normal installation fails. However, these processors are in fact able to run the latest (and PAE-demanding) kernels if only the installation process is modified a little. The problem is not missing PAE, it’s about the processor not displaying its full capabilities.”

I can just imagine an IBM or Intel engineering thinking…it’ll be 10 years before operating systems require a PAE extension…none of these chips will still be running then…lets call it a night and not bother displaying the PAE flag…

Editing cellphone videos in Ubuntu Linux

If you have a slightly older android cell phone, chances are it records videos using the “3gp” format. When editing 3gp videos in OpenShot on Ubuntu, the audio and video can become unsynced. I have found that using the WinFF application you can convert the 3gp video into “DV – Raw DV for NTSC full screen” format, which will allow OpenShot to edit it correctly without having audio sync problems.

As a side note, sometimes when shooting videos with a cell phone, you may forget to rotate the phone to “landscape” orientation and be left with a vertical video that is rotated 90 degrees when shown on a computer. OpenShot can be used to rotate videos as follows:

  1. right click on the clip
  2. click Properties
  3. Choose the Effect tab (far right)
  4. Hit the “+” sign and then scroll down to “R” for Rotate.
  5. In the effects settings:
    • set the Rotate X, Y and Z to 0.00
    • set the Fixed Rotate X variable to 90.0.
  6. Hit apply

Electric Pickup Truck: Cost of Ownership

ev_operating_costs
We have owned an electric S-10 pickup truck for the last 1008 days (2.75 years) and used it as a daily driver. It was driven most frequently to the MARTA station, a 4 mile round trip commute, but also made trips to hardware stores, the Georgia Tech Campus, and to the homes of various people who were selling furniture or other larger items on craigslist. It uses twenty (six volt lead acid) golf cart batteries for its traction pack, and they have gradually lost capacity. When brand new, I would take the truck on 20 to 25 mile trips without stressing the battery pack. Recently however, the absolute maximum range of the truck had dropped to 12-14 miles and if you actually drove it 14 miles you could watch individual batteries hitting their absolute end of their state of charge. Although it could have functioned as a “Get to the MARTA station” vehicle for another year (or two?) I decided it was time to replace the pack to be able to comfortably go to the hardware store or make an extra emergency trip without worry. I have placed 685 charge cycles on the pack, which is in line with the lifespan for lead acid golf cart batteries.

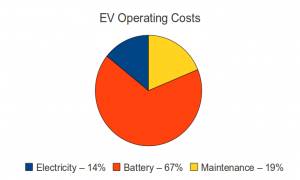
The replacement pack cost $2,171 (I gave back all but one of the used batteries for the core charge), which gives me the final piece of information needed to calculate the total cost of ownership over the last 1008 days. We spent $464 on electricity (estimated at $0.11 a KWH), $610 on maintenance, and the previously mentioned $2,171 on batteries. Obviously, the battery pack is the large cost here. In fact, the electricity cost is very small on a monthly basis, and was never more than 10-15% of our total KWH usage.

We drove a total of 4,861 miles in that timeframe, giving a cost of $0.66 a mile or $3.22 a day. This does not take into account licensing and insurance, but those costs would be exactly the same for an internal combustion engine (ICE) vehicle. If the S-10 were an ICE model, it would probably get around 20 mpg, so the fuel cost (estimating $3.50 for a gallon of gas) would be $0.175 per mile. So for 4,861 miles it would take 242.55 gallons of gas or a fuel cost of $849. This would imply that an ICE vehcile would have to have a maintenance cost of $2400 to get the same per mile cost of ownership as my EV.

Although ICE vehicles are more expensive to maintain, unless something major on the engine exploded, it looks like my hypotheical ICE S10 pickup wins the straight up cost comparison. Of course, I never had to drive out of my way to stop at a gas station, and there is the matter of 242.5 gallons of gas I didn’t use. (the lead and plastic in my batteries goes back to the factory to make new batteries)

In the interest of full disclosure, my first pack of batteries was purchased at a Sam’s Club for $1,800, so my true cost per mile is closer to $0.59. (But I used the pack replacement cost as an estimate for the cost of ownership for my next pack.)

I am hopefull that my 2nd pack (from Interstate batteries) will last longer, either because Interstate sells better batteries, or because I have learned how to care for them better. (Although I don’t think I did anything horrible to murder the first pack…)

Small Phone Review: Sony Ericsson Xperia Mini cell phone

I recently purchased a Sony Ericsson Xperia Mini ST15a Cellphone to see if I would like it enough to replace my HTC Aria / Liberty A6366. (I did a review of the aria here.)

Form Factor:
I specifically picked the Xperia Mini because it is a small phone. Small enough to fit in my backpack’s older style cell-phone pocket. Small enough to (easily) fit in my front pocket if I want to carry it around without my backpack. From an outline standpoint, it is actually smaller than the HTC Aria, (and weights a half oz less) but it is almost 50% thicker (only 16mm or 0.63 inches). I was slightly worried that it might be a bit too thick, but after using it for a few days I have decided that it’s fine. The extra thickness is nice to keep it from disappearing in my hand…it’s a VERY small form factor for a modern android smart-phone.

Buttons & Ports
The audio jack comes out the bottom of the phone, which means I have to put it in my backpack’s cell-phone pocket upside down when listening to music with headphones. The micro-USB port is also on the bottom, and covered by a small removable plastic tab that is “hinged” to the phone with a small piece of plastic that goes into a hole. I doubt that the plastic tab will last for more than a few months, as I plug in the phone to charge at least twice a day. The USB port has a “square” appearance, and does not look like a micro-USB on first glance. You have to look inside of it to determine which way is “up” (it’s “upside down”…), but a standard micro-USB cable does work with it. Not major issues, but I don’t see the point of having a removable cover for a port you are going to be using multiple times a day.

A volume up/down rocker is on the top right side, and the bottom right side has a dedicated camera button. You have to long-press the button to auto-start the camera application, I have never started it by accident, and it’s nice having a dedicated button to pull it up. The power button is on the top left.

The battery cover/back of the phone snaps on and off from the side and wraps around the back of the phone. You have to pull the battrey to change the SIM card, and the back cover has a small plastic tab that holds the MicroSD card in when the cover is on. (You need fingernails or tweezers to remove the microSD card, it does not have any push-spring-return mechanism.)

The phone’s speaker, LED flash, and camera lens are on the back.

Screen:
The screen is just slightly (0.2in) smaller than that of the Aria, and has the same resolution (320×480). Even at the full brightness setting it doesn’t appear to be as bright as the Aria’s screen, but I haven’t noticed it being too dim either. According to the Internet, the glass is “scratch resistant” but not “Corning Gorilla Glass”. I typically use a plastic screen protector on all of my phones (at least for the first year or so) and keep them out of pockets with keys, so the exact type of glass probably doesn’t matter. Percentage wise, a much larger portion of the front of the Xperia is screen.

Software/UI:
I purchased a phone that was not carrier branded, so the only pre-loaded apps it had came from Sony Ericsson. I was able to remove, disable, or hide all of the annoying pre-loaded offers and things I didn’t want, and almost immediately downloaded the Sony Phone Companion software for my PC to upgrade the phone to Android 4.0.4, so I can’t comment on the original Android 2.x OS that the phone originally shipped with.

Android 4.0 on the phone is as good as my CyanogenMod ROM on the Aria. My phone has full support for setting itself up as a wifi-hotspot for wireless tethering. (Perhaps carrier branded versions of the phone have that part of android disabled?) It also supports various VPN’s out of the box (noticeably lacking is OpenVPN, I had to set up a PPTP server at home, which was actually a lot easier than getting an OpenVPN server working). In short, the stock OS/ROM did everything I want from a phone, so I don’t anticipate having to root the phone and install CyanogenMod on it anytime soon.

Freedom/ROM Support
However, I am happy to report that CyanogenMod did support this phone (I use the CyanogenMod supported phone list as a pre-filter for any phone shopping, just in case I don’t like the default software the comes with the phone.). I am even happier to report that Sony Ericsson fully supports you voiding your warantee by providing an online service that allows you to unlock your bootloader so that you can replace it with anything you want. This feature is what made me specifically decide to give the Xperia a shot.

Camera/Flash:
I like having an LED light on the back of the phone. I installed an application that lets me switch it on and off from the home screen. Even if it didn’t act as a flash for the camera, a flashlight seems like such a useful thing to have built into your phone I don’t know why all phones don’t have them. I haven’t actually evaluated the phone’s camera yet….

The biggest negative of the phone is the limited memory footprint, and with modern applications (I’m looking at you Google!) starting to take up more and more space, I find myself having to choose what to un-install just to be able to install updates on other more critical applications.
Using a Raspberry Pi as a RepRap print host with webcam

I set up a Raspberry Pi as a print host for my RepRap (using the Pi Camera Board as a webcam to view the print status). Here are my summary steps:

  1. Install Rasberrian and update it.
  2. Configure your system to enable wifi (if used) and camera board (if used) and enable the SSH server if you want to remotely administer the pi board using the “sudo raspi-config” command (you may also want to tweak your overclocking settings here, I’m using “Moderate”)
  3. Install OctoPrint following directions here: https://github.com/foosel/OctoPrint/wiki/Setup-on-a-Raspberry-Pi-running-Raspbian
  4. If you have a camera board, you may need to update your pi firmware (sudo apt-get install rpi-update; sudo rpi-update)
  5. To get the camera board set up as a streaming webcam, install mjpg-streamer experimental version from here:
    “git clone https://github.com/jacksonliam/mjpg-streamer”
  6. You can compile it on the Pi using these instructions:
    http://www.instructables.com/id/Create-an-internet-controlled-robot-using-Livebots/step5/Get-the-webcam-streamer-for-Raspberry-Pi/ (ignoring the step to download from sourceforge.net)
  7. Install the plugins to /usr/local/lib with “sudo make install”. Copy the www directory to the same location.
  8. Start the webcam streamer: mjpg_streamer -o “/usr/local/lib/output_http.so -w /usr/local/lib/www” -i “/usr/local/lib/input_raspicam.so -x 640 -y 480”
  9. Start OctoPrint (“OctoPrint/run”)
  10. Test it by pointing your browser to your raspberry pi’s IP address, port 8080 for the mjpg-stream and port 5000 for OctoPrint
  11. When all that works, put some commands in your /etc/rc.local file to start them both up whenever your Pi boot sup. I used: su pi -c ‘/home/pi/OctoPrint/run’ & AND su pi -c ‘/usr/local/bin/mjpg_streamer -o “/usr/local/lib/output_http.so -w /usr/local/lib/www” -i “/usr/local/lib/input_raspicam.so -x 640 -y 480” ‘ &

My Thoughts: Everything works great on a wired (ethernet) connection, but my wifi adapter is performing extremely poorly for streaming video of the printer. Also, why can’t the camera board just have V4L support out of the box?