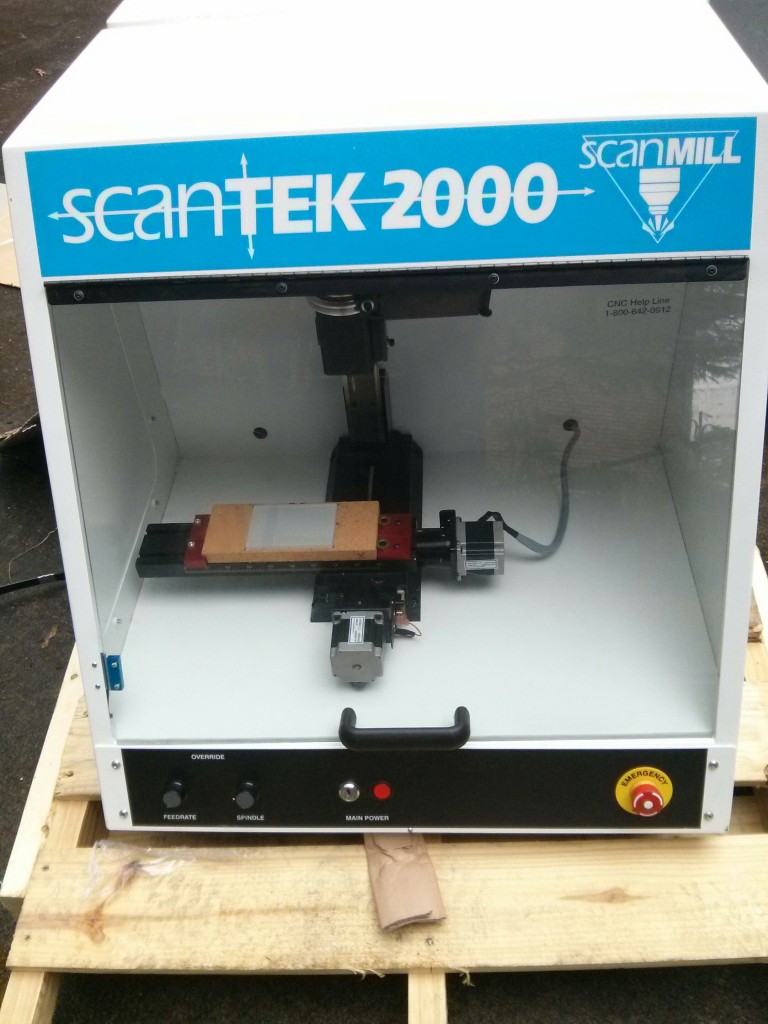
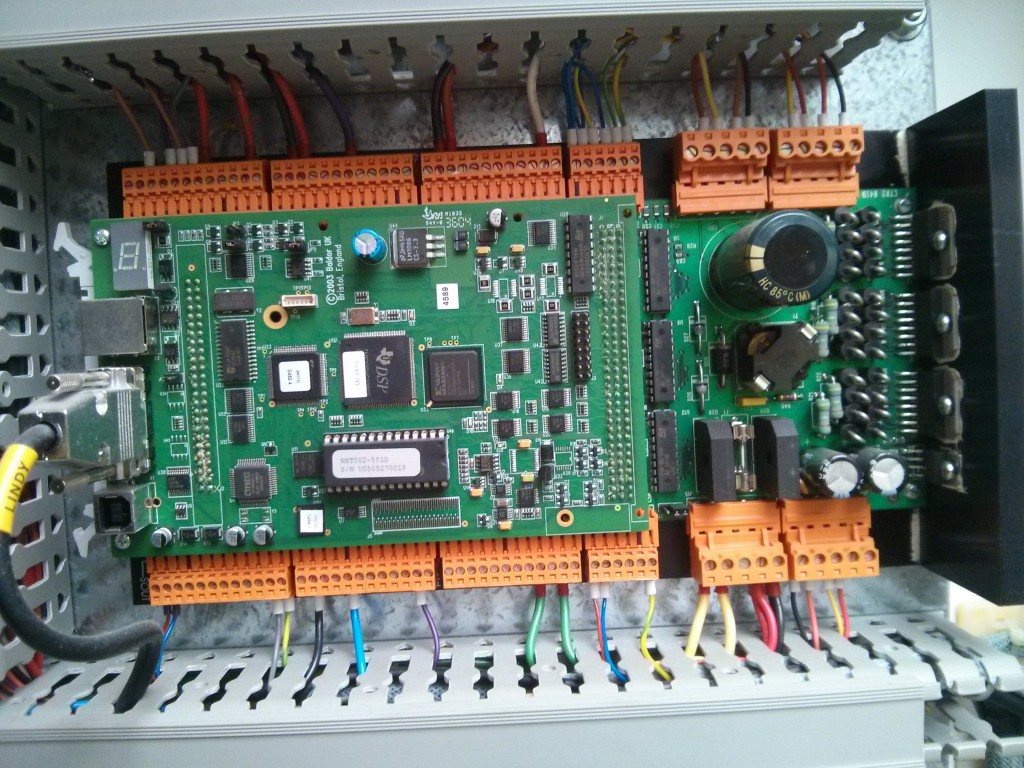
I purchased a ScanTek 2000 ScanMill (a rebranded Denford Micromill 2000) that consists of a Sherline 5400 CNC milling machine inside of a steel case. It is normally controlled via proprietary software (VM Milling 5) that controls a baldor NextMove ST motion control board. I removed the top card of the motion control board and wired up connections to it from a parallel port break-out board so that I could control the mill using LinuxCNC (or Mach 3). You can read about my process here:
- Initial bootup.
- Defeating the front panel key switch.
- Getting the X/Y/Z stepper motors working.
- Reading the home / limit and emergency stop switches.
- Turning on the Spindle Go Relay and hotwiring the spindle driver control board.
- Controlling the spindle motor driver board via PWM signal through the Baldor NextMove ST control board.
- Fixing the spindle motor bracket.
- Playing with g-code.
Oh yes, I also have a matching CNC Lathe…
A previous project I did involved constructing an X/Y table using Ikea surplus drawer rails, and you can read all about it here:
- I started off by using Ikea drawer rails and surplus MDF board for the mechanical parts and got the X axis working.
- Then I added the Y axis mechanism and was able to draw in two dimensions under computer control.
- Here is a post about the Electro-Mechanical parts of the router
- I added limit switches to the X and Y axis.
- My new Ocean Controls serial stepper controller arrived.
- My first performance test and platform leveling
- Cutting out my first part and building a bearing assembly.
- Making angle iron bearings and the Z-axis cart.
- More on the z-axis cart and pipe adjustment assemblies
Costs:
| Category | Item | Cost |
| Mechanical (IKEA AS-IS room) | Base, X-platform, Y-Platform X/Y linear rails (drawer pulls) Raw Material (MDF board) for Z-cart & base |
$3 $2 $1 |
| Mechanical (ACE Hardware) | M4 screws, washers & nuts (servo mounting) wood screws SM screws & washers 2×1 x 8foot piece of wood 1-foot plastic tubing 4 foot 3/4 inch steel angle iron Eight 1/4inch bolts, nuts, and nylon locking nuts for Z-axis bearings 2x 12 inch by 1/2inch black “nipple” pipe (z-axis) 100pc box of 6-32 machine screws and nuts (pipe adjusters) |
$2.21 $3 $1.88 $3 $0.19 $11.23 $8.48 $6.98 $8.28 |
| Total Mechanical | $51.25 | |
| Electronics (may be re-used on 2nd Gen router) |
3 Surplus Linear Actuator (servos) 3 Stepper driver boards (kit) Servo Serial Control Board 6 micro-switches |
$75 70.50 (AUD, or $44.52 USD) 65 (AUD, or $41 USD) $7.20 |
| Total: | $218.97 |
I expect to re-use the steppers and driver electronics in my 2nd gen milling machine. I also bought a “dremel drill press” to use as a temporary (human operated) Z axis on my first gen router for $15.

Pingback: Jay’s Technical Talk › CNC Mill Electronics
Pingback: Jay’s Technical Talk › X/Y Table Motion, or 2.5 axis CNC router
Pingback: Jay’s Technical Talk › CNC Router (Milling Machine) from IKEA Surplus parts
Pingback: Jay’s Technical Talk › Limit Switches: Important!
Pingback: Jay’s Technical Talk › New Serial Controller
Pingback: Jay’s Technical Talk › First performance evaluation
Pingback: Jay’s Technical Talk › CNC - First 2.5D cutting
Pingback: Jay’s Technical Talk › Bracket Assembly & Skate Bearings
Pingback: Jay’s Technical Talk › Angle-Iron bearings and Z-axis
Pingback: Jay’s Technical Talk › Z-axis cart and adjustment assemblies
Jay I I’m doing your denford conversion using the bob you mentioned,I was wondering if you had a pinout for the 25 pin cable you used,there are tons of different versions out there,the one I have is a strait through cable with all pins going to the same number,some of these cables cross and I’m not sure of the one I need.
Thank you
Dan
I believe I used a standard printer cable. I know that the one I bought from CNC4PC with the BOB was:
A83 – 5 FT PARALLEL CABLE – DB25 MALE/FEMALE
SKU: A83
I think that one worked fine to connect the BOB to my computer. However, I *THINK* the cable I used inside the mill was this one:
C2G 02665 DB25 M/M Serial RS232 Cable, Beige (6 Feet, 1.82 Meters)
https://amzn.to/2FGC5R0
I believe the important part was that it had a male plug on both ends. This allowed me to plug a regular parallel port cable into the outside of the mill and then into my computer.
The photos here show that the cable I installed into the exterior wall of the mill has male pins.
https://www.summet.com/blog/2016/03/26/micromill-mach3-linuxcnc-conversion-complete
Howdy!
Been following your Denford conversion with interest…
I got the core parts of one on eBay (https://www.ebay.ca/itm/264778811679) and I’ve been slowly documenting the wiring with the intent to remove it from the base and mount just the stepper driver in a smaller case. (none of the original base/shroud was there) I don’t care about the motor control since I converted my Taig mill to use a large R/C brushless motor and will do the same with this one. (“large” is relative, my BL motor is about 1/3 the size of the Sherline motor!)
Anyhoo, the one wire I haven’t been able to trace with certainty is the centre-tap on the transformer output. It may not be relevant, but I’m puzzled what it would be used for since the driver board gets 30V AC from the transformer and grounds to Earth.
Any ideas?
Thanks!
Unless something needed 15v AC instead of 30v AC, I also have no idea what the center tap is used for.